Mobomo webinars-now on demand! | learn more.

When we founded Intridea in 2007, we came to a realization: If we wanted to build a truly revolutionary software company, we couldn’t restrict ourselves to hiring local talent. We’d have to reach beyond our own backyard and scope out the premier software developers and designers from across the globe.

Plus, we wanted to foster a culture of productivity and creativity at Intridea. We didn’t want to emulate the old-school customs and rituals that traditional companies follow. So we decided to create something completely different—the kind of creatively-charged workplace we’d always dreamed about.

But how would we pull all that off? And suddenly, the answer became crystal clear: We would create an entirely remote company, or a distributed team. And that’s exactly what we did...

Today @Intridea

Fast-forward to today. Intridea is still a fully distributed company with more than 30 employees sprinkled across the globe. Our workers don’t fight their way through rush hour traffic to parade into a brick-and-mortar office building. They don’t toil away on software designs in a sea of cubicles or a labyrinth of closed-door offices, nor do they meet each morning face-to-face around a conference room table. Instead, our software developers and designers work from the comfort of their homes—from Washington DC to New York City, California to Colorado, Maine to Missouri and beyond. Whether they wear pajamas and fuzzy slippers, sweat pants or jeans and whether they choose to work from their couch, a local coffee shop, their back porch or a home office, we don’t know, and frankly we don’t care—as long as they continue to create radically engaging, state-of-the-art software solutions.

Distributed is Here to Stay

Since we founded Intridea seven years ago, we’ve seen an explosion in the distributed trend across the globe. Because remote teams offer tremendous advantages, an increasing number of corporations and entrepreneurs are going mobile.

But you don’t have to take our word for it. Just feast your eyes on the numbers:

The U.S. Census Bureau reports that 13 million people (9.4 percent of the working population), work at home at least one day per week. That’s quite a leap from 7 percent in 1997. By 2016, 63 million Americans will be working remotely, Forrester Research predicts, adding that this trend will have a “far-reaching” impact on the nation’s economy. By 2020, 89 percent of all companies will have adopted mobile work styles with fewer office-based employees, Citrix predicts. Nearly three-quarters of companies that have adopted mobile work benefit from a more flexible, agile workforce, and more than half reported lower employee-related costs, Citrix reports. Nearly half of the companies also reported a greater ability to attract and retain top talent.

When you look at the research, it’s clear that distributed isn’t just a passing fad. This trend is here to stay.

Boundless Benefits

It’s really no wonder why the distributed trend is surging throughout the business world. With employees working remotely, companies can operate with very little overhead, often saving more than 30 percent on operating costs. To top it off, evidence shows that remote workers are generally more productive, happier and healthier.

For example, the U.K based telecom company O2 experimented with virtual work by allowing 3,000 of their employees to telecommute. More than one-third of the workers reported being more productive as a result of being able to work from home.

The list of favorable stories and statistics goes on and on. In fact, research proves that the distributed trend not only benefits employees and employers, but also society at large. We’ll delve more deeply into these advantages in our next three blogs.
Does your company work remote? Keep the conversation going! We'd love to hear from you.
Categories
Author

We're RAD y'all!

In today's post, we're going to cover the following:

  • A new version of Framer
  • Tweaking our HTML ever so slightly to accommodate the app
  • Loading the PSD and creating global variables for our views
  • Adding sound effects
  • Configuring our view states
  • Animating our views

A whole new world

No, this isn't a segue into Aladdin but it's as equally exciting. A new version of Framer was released shortly after my last post and fortunately for us, the new build includes a host of changes and improvements. Thankfully, only a few of those changes impact our project; the need for Fastclick which removes the 300ms delay on press and some small syntax changes.

Make sure to update your version of Framer and grab these project files before you begin. Moving forward, I'm going to assume that you've downloaded the project files, opened the PSD and have run Framer to compile the project directory.

Tweak it

The new version of Framer doesn't include as much in the head of our index.html so now we'll need to make some adjustments. These include:

  • Using the viewport meta tag to control the size of our view on devices
  • Adding the apple-mobile-web-app-capable to make the app fullscreen
  • Setting apple-mobile-web-app-status-bar-style to black (personal preference)
  • Using the Ben Markowitz method to add app icons
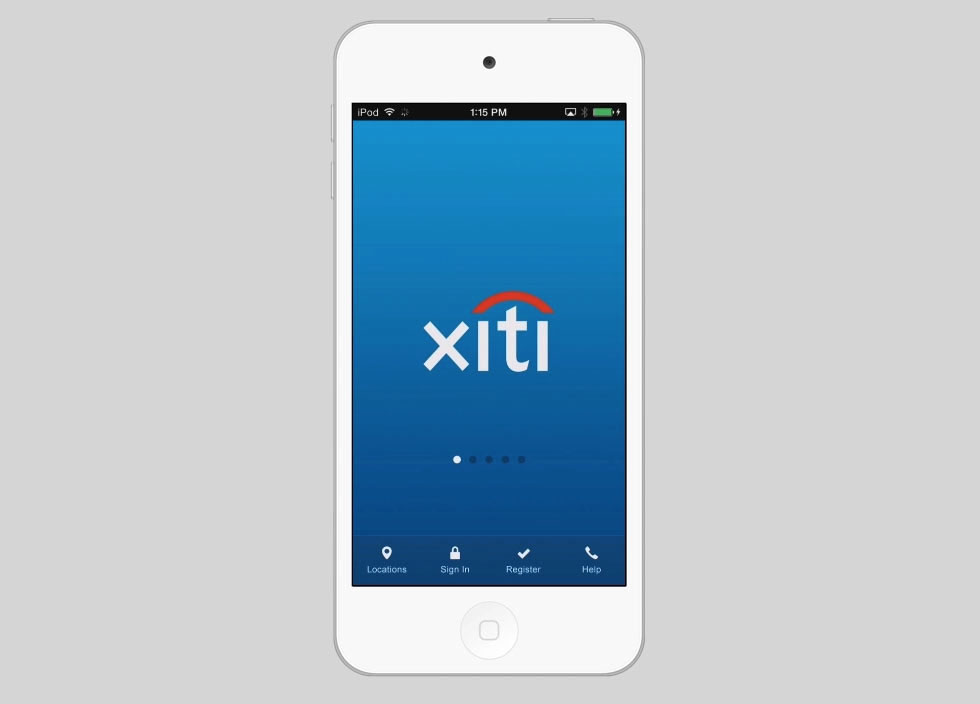
  • Naming our app "xiti" with the apple-mobile-web-app-title tag
  • Adjusting the body css, which we did already
  • Adding jquery and an HTML5 Mobile audio library, which I'll cover shortly
  • All of which can be found in project files

Load the PSD and global variables

Once you've updated your index.html, open the app.js file. You'll see that Framer has included a line of code to import your PSD file. Leave this in there and let's make things easier by adding for loop to make our views global variables for quick access. The loop reads through our myLayers array and creates a variable for the layer group name and for it's original state, such as the opacity, position, etc. Doing so will make it a lot easier to animate them. I've also included a console.log for our view names because then I don't have to jump back into PS to remember a layer group name.

myLayers = Framer.Importer.load("imported/iPhone5-Portrait") for (var layerName in myLayers) {     window[layerName] = myLayers[     window[layerName].originalFrame = myLayers[layerName].frame;     console.log(layerName); } 

Add fancy

This next bit of code doesn't have much to do with Framer but the Devil's in the details, right? We'll be using the jquery.mb.audio library for mobile HTML5 audio to add a small "pop" on load. Why now you ask? Because I'm saving the best for last.

Open your app.js and add the following:

$.mbAudio.sounds = {     effectSprite : {         id  :   "effectSprite",         mp3 :   "assets/click.mp3",         sprite :    {             intro : { id:"intro", start: 0, end: 1, loop: false}         }     } } App_background.on("start", function(){     $.mbAudio.play('effectSprite', 'intro'); }) 

The above code:

  • Creates an mbAudio object, assigns an ID and asset to it and sets the play methods
  • Then waits for the app background animation to start and on doing so plays the sound

We could change App_background to any view name, such as Tab_Bar or Slide_1, and the sound would play when that view has begun animating.

Configure view states

  • Design for the animation end state
  • Get each elements initial properties using the loop above
  • Configure "from states" for the items you'd like to animate -- For example, I'm going to animate the background in from Opacity: 0, so I'll set it to 0 in the code then animate it to 1
  • On event, such as click, animate the object using the configured state to their "end", or designed, stateApp_background.opacity = 0; Slide_1.y = 1000; Bullets.opacity = 0; Active.opacity = 0; Active.scale = 0; Tab_Bar.y = 1200;

The above code does the following:

  • Sets the app background, or blue gradient, to 0
  • Places the Slide_1, xiti logo, just outside of the view
  • Makes the bullets and the active bullet invisible
  • Shrinks the active bullet down
  • Moves the tab bar off screen using the Y coordinate

Now for the fun part

Here's what happens with our animation:

  • Change the App_background opacity from 0 to 1
  • Move Slide_1, the xiti logo, up to it's original position as shown in the design
  • At the same time, bring the Tab_Bar up as well but delay it by .1 second
  • Also bring the Bullets into view by changing the opacity from 0 to 1
  • When the bullets have finished animating, change both the opacity and scale of the active bullet using a "spring" curve

Let's take a close look at our first animation call.

// Animate our app's background App_background.animate({ // Set the end state properties: {     opacity: 1.0 },  // Set the desired animation time time: .5  // On end, do stuff }).on("end", function(){     Slide_1.animate({... 

Now let's add them all together.

App_background.animate({     properties: {     opacity: 1.0 },  time: .5  }).on("end", function(){     Slide_1.animate({         properties: {             y: Slide_1.originalFrame.y         },         curve: "spring(377,31,0.50)",         time: .2     })     Tab_Bar.animate({         properties: {             y: Tab_Bar.originalFrame.y         },         curve: "spring(477,41,1)",         delay: .1,         time: .2     })        Bullets.animate({         properties: {             opacity: 1         },         delay: .2,         time: .1     }).on("end", function(){         Active.animate({             properties: {                 opacity: 1,                 scale: 1             },             curve: "spring",             time: .1         })     }) }) 

If you've really been paying attention then you'll notice a few extra lines of code that I didn't cover, the .originalFrame, delay and curve properties.

  • .originalFrame refers to an elements initial state or the end state that I mentioned above
  • The curve property configures the type of animation used by the object
  • The delay sets the amount of seconds to delay the animation before start

Wrapping things up

I think it's pretty safe to say, that's a lot of words. Over the course of this series, we've:

  • Covered a proposed RAD flow
  • Used the DevRocket Photoshop plug-in
  • Setup a GhostLab site
  • Briefly addressed why designers should code
  • Created app icons using the Ben Markowitz method
  • Used those icons and adjusted the screen to accommodate screen size
  • Made the app full screen by adding it to the home screen
  • Used Fastclick to make things feel quick-fast
  • Checked out a new version of Framer
  • Created global variables for our views
  • Added sound effects
  • Configured our view states
  • Animated our views

We're really just scratching the surface of what's possible with Framer—there's so much one can do. I highly recommend visiting the example library and spending some time digging into the samples. Staggering, dragging, chaining, snaps, states and more all nicely organized and commented for your educational needs.

Check out the entire Get RAD series below!

  • Get RAD, Part I: DevRocket + Prototyping
  • Get RAD, Part II: App Icons
Categories
Author

boxen

In the year since Intridea started using Boxen (GitHub's Puppet-based automation solution for OS X), a lot has happened. Not only are folks all over the company embracing it, but we've also become extremely proficient with it. Boxen's documentation, while improving, has us wanting to share our configurations as a way to help new users. However, due to containing client information, we have been unable to share our Boxen repository.

Until now.

Today, we are open sourcing our Boxen repository.

To do this, we are maintaining two repositories: One public and one private. The only difference is in the project-related details. The contents of each user's project manifest is empty in the public version, like so:

class projects::people::gary { } 

While the private version contains whatever projects they would normally include as part of daily use:

class projects::people::gary {    include projects::intridea::omniauth   include projects::client::secret  } 

The user's project manifest is then included in a standardized way:

class people::gary {    include projects::people::gary  } 

Using this layer of indirection for projects, along with the personal project inclusion pattern shown above, makes for dead simple maintenance between the repositories. Said pattern creates a line between public and private information, keeping sensitive details stored exclusively in each user's project file, and then using a blank placeholder on the public version of the repository. Using placeholder project manifests combined with the indirection we add for personal project inclusion ensures that no client information will be leaked to the Web.

Why go to all the trouble of open sourcing configs?

Every piece of knowledge can help someone else, no matter how trivial it may seem. When we first got setup with Boxen, writing a personal manifest seemed like a daunting task. Boxen's documentation, although better now, is still lacking. In many cases, reading others' configurations can be a bigger help than sifting through Boxen's code and Puppet's (good, but exhaustive) documentation.

Just as we found Plyfe's boxen repo to be so helpful that we used it as a baseline for our own configs, our goal in open sourcing our Boxen configuration is to pay it forward for the next organization that takes up Boxen.

Got any tips or tricks for using Boxen? Send us a tweet or message us on Facebook!

Categories
Author

The intersection of man and machine has always been of great interest to Intridea. While much of our work focuses on software, we've also been exploring the hardware side and the increasing demand for human-software-hardware interaction.

The machines we interact with are no longer just typical computers and phones. They're increasingly specialized hardware devices like the Nest thermostat, Fitbit, 3D printers, and more. In our exploration of these interfaces, we've built a multitude of gadgets and devices. Some playful and some serious.

Over the coming months we'll show you what we've been up to, delve deeper into how these gadgets came to life as well as what it means for UX, software, and the future Internet of Things and Social Machines.

Our first example, DiceBot, takes a 1920's antique dice game and adds some additional hardware and a few software layers to make it interactive and connected.


We added a motor to the dice roller so we didn't have to spin it manually then connected it to a RaspberryPi via a L298N and GPIO so we could control the motor programatically. Then using OpenCV we created a program to recognize the pips on the dice that got rolled and output a count.

The device is connected to the Internet and controlled via Twitter using a couple Ruby scripts; one that listens for Tweets and queues jobs and another that listens for jobs, spins the wheel, counts, and puts the results back on a queue. To operate the device you simply send a tweet to @IntrideaDiceBot with the hashtag #RollTheDice and it will add you to the queue. When your turn comes up, it will spin the dice, count the pips, and Tweet back to you the count, plus a picture of the roll. You can see all the latest rolls on dicebot.intridea.com.

Here's an example:

@naffis: Hey @IntrideaDiceBot, I'm feeling lucky #rollthedice cc @intridea

@IntrideaDicebot: DiceBot rolled you a 7, @naffis. See your roll at dicebot.intridea.com #DiceBot #INTRIDEA

Stay tuned! In the next few posts, we'll be illustrating each step for creating Dicebot:

  1. RaspberryPi GPIO and L298N control of the motor.
  2. OpenCV image recognition program to count the dice pips.
  3. 3D Modeling and printing of the enclosure and other apparatus.
  4. The scripts and workers that interface with Twitter and allow control of the device.
  5. The Single Page App (SPA) that ties it all together using Firebase and AngularJS.

So next time you're playing D&D or you want to use a physical random number generator take the DiceBot for a spin.

Got any suggestions or cool projects you're working on? Keep the conversation going!

Categories
Author

At Mobomo, building things is our passion, and sometimes an opportunity to build comes through supporting a worthy charity.

Last week, we were honored to support Children’s Hospital’s charity, Milagros para Niños at their inaugural brunch. Milagros focuses uniquely on aiding Hispanic patients at Children’s Hospital, a group that accounted for approximately 55,000 patient cases in 2013, with mostly uncompensated care. Through Milagros, children whose families may not have funds to pay for their hospital bills—or worse, lack basic Metro fare to visit their children—receive services uncovered by insurance, such as translators, therapies, transportation, and other crucial resources.

mobomo-supporting-charity

Mobomo and other supporters enjoyed a Latino-inspired brunch at the Embassy of Mexico’s Mexican Cultural Institute, and were entertained by a mariachi band and celebrity emcees Cindy Pena, and 107.9 Morning Host, Pedro Biaggi.

mariachi-band-mexican-embassy

The day was filled with countless wonderful moments, but the highlight was the announcement that Milagros had raised $20,000 through the event! To offer your support to this great cause, contact Ashley Nolan, Assistant Director of Milagros para Niños.

Categories
Author

At Mobomo, we love to give back—and there’s nothing better than giving back while doing the thing that we love most: building things.

This past weekend, we were thrilled to support a great organization, Cyberjutsu Girls Academy, a non-profit STEM program that seeks to empower girls to build bright futures by teaching them about cybersecurity and technology.

In an engineering lab at the University of Maryland – College Park, and TeqCorner, Arlington, VA, Mobomo led approximately 50 middle school-aged girls on their quest to build their very first Android app. Utilizing MIT’s savvy program, App Inventor, the girls were given four development objectives, which ultimately resulted in four working apps!

These budding developers loved coding so much, that some went on to make apps far more complex than directed: by the end, we had apps that could talk, apps that were 5 modules deep, apps that could be erased with a shake—and even fortune-telling apps! The girls also played with Google Glass, and took expert videos and pictures, and successfully searched for Scotland’s national animal.

Great job, Cyberjutsu! With such enthusiasm and smarts, we may have to hold a few jobs here at Mobomo for you!

Categories
Author

sorry
It happens even to the best client services teams. Eventually you’re going to fail a functional test or break a build. And when you do, you’ll need to apologize for missing the mark. Here’s how.

Decide whether you’re actually sorry.

Clients sense insincerity right away. If you’re not actually sorry don’t fake it. Instead, respectfully listen to your client’s position and look for a way to address her concerns. But you can’t say you’re sorry when you’re not.

Say the words:

“I’m sorry.” If you agree you’ve fallen short of the mark saying the words “I’m sorry” makes it clear. Don’t be ambiguous.

Express sincere remorse.

Never issue a politician’s apology. Tip: if the first word after I’m sorry is if, you’re doing it wrong:

“I’m sorry if your perception of relationship boundaries diverges from mine. I understand that for some sensitive people this divergence can cause angst.”

Better:

“I’m sorry I made a pass at your sister and I won’t do it again.”

Do it in person.

While most client management can be conducted remotely, kickoffs, launch parties, and apologies all happen in person.

Issue the apology forthrightly and move on.

Groveling makes people suspect you want their pity, which never breeds respect. Instead, be specific about what you got wrong and how it hurt your client.

Invite your client to vent.

While you must show up with a plan to cure, don’t move to the cure too quickly. Invite your client to express frustration, and don’t let it get under your skin. Remember: you let them down, they’re human, and they need to vent.

Share your plan to cure.

After the words “I’m sorry” your plan to cure is the most important component of the apology. It shows your client not only that you understand where you fell short, but you also have identified the behaviors that led to the shortcoming and understand how to change those behaviors to fix the problem. Be detailed: what will you change? When will it happen? How can the client measure the change with interim milestones? But…

Don’t over-promise!

This is the hardest piece of advice to follow when issuing an apology. You let your client down, you feel terrible, and you want to move heaven and earth to make it right. But when you over-promise on the heels of an apology you’re just feeding your own narcissism instead of trying to fix your client’s problem. Promise only what you can deliver and no more.

Fix the problem and don’t let it happen again.

Clients are just like you. 99% of your clients are smart, hard working, care about what they do, and don’t relish conflict. Don’t embarrass your client or yourself by finding yourself in the same conference room eight weeks later issuing the same apologies and making the same empty promises to cure. Virtually every client you encounter will give you a second chance. No one will give you a third.

Have you had a tech company apologize to you? What was it like? We'd love to hear from you.

Categories
Author

We’re over the moon for NASA, who has just won a 2014 Webby Award!

Presented by the International Academy of Digital Arts and Sciences, the 20-years running Webbys are a highly respected and coveted Internet industry award. Touted as the “Oscars of the Internet”, Webbys are given for “Excellence on the Internet, including Websites, Interactive Advertising, Online Film & Video and Mobile content”. Past winners have included Al Gore, Meg Whitman, David Bowie, Prince, Thomas Friedman, and countless others—both individual and organizational.

watch-webby-awards-online

NASA is this year’s People’s Voice Award winner for Government: no small feat, as the Webbys notably bring in more than 1.5 million worldwide voters. What’s more? NASA beat out four other contestants with a whopping 59% of the votes! We are humbled to have worked alongside NASA and InfoZen to build this award-winning website.

Congratulations on your achievement, NASA! You’re out of this world.

Categories
Author

Mobomo was excited to accompany our client, Sister to Sister, just a few weeks ago at their first ever American College of Cardiology (ACC) Conference! Hosted at the Washington Convention Center, the ACC Conference consisted of a 3-day session devoted entirely to heart health and the latest developments in heart science. Thousands of cardiologists and those closely connected to heart health travelled from around the country (and further) to champion healthy hearts.

While there, Sister to Sister presented its heart risk assessment tool, Smart for the Heart, to conference attendees, and received a great response! Users loved the app’s simplicity, its vibrant colors, and the helpful recommendations it offered to aid them in their heart health journey. Our app’s credibility didn’t hurt either: cardiologists appreciated that it was based on the latest American College of Cardiology and American Heart Association science-based criteria!

Attendees also loved that Smart for the Heart is a women-focused heart health app, and we’re proud to be working with a notable leader in women’s heart health. We’re thrilled by the experts’ reception of Smart for the Heart, and looking forward to our continued partnership with Sister to Sister as they fulfill their mission of improving (women’s) heart health. To try the app and calculate your heart risk, search “Smart for the Heart” on iTunes or Google Play, or visit the web-based tool.

Categories
Author

crisp

The battle for consistent font smoothing is a universal struggle for web designers. Photoshop has its own proprietary way of displaying type, none of which accurately reflect browser rendering. Every browser renders type in its own way AND even operating systems have their own method of text rendering. Oy!

Consistency just doesn't seem to exist in the type rendering world. However, channeling my frustration into productivity, I did successfully implement a little trick in Google's Chrome & Safari (Mac OS) to counteract this dilemma.

Note: Before I dive into this technique, this is a solution for now, and while it works, its effectiveness is not definite.

Sub-Pixel Rendering

Sub-pixel rendering is:

Subpixel rendering is a way to increase the apparent resolution of a computer's liquid crystal display (LCD) or organic light-emitting diode (OLED) display by rendering pixels to take into account the screen type's physical properties. Source

What this means is the typeface, regardless of how it is being served (Typekit, Google, @font-face) is loaded and then computed at a sub pixel level. The smoothing happens in a space we can't see easily.

Because of this, some browsers (looking at you Chrome & Firefox) take beautiful, slender fonts and bloat them, making the edges appear jagged, losing the quality of beautiful, crisp shapes us designers crave in web type.

You Might Be Working With a Font That Doesn't Need Subpixel Rendering

This fantastic article from UsabilityPost does a good job illustrating why you should not remove sub-pixel rendering. This has been the de facto standard, working its way into many UI/UX practitioners toolbox. However, this article is more than a year old, and we are in a very different space then 2012.

High-PPI monitors and devices are changing how type is rendered and it wasn't until I got a retina MacBook Pro that my gears began to turn.

High-PPI Monitors Give us Leeway

Sub-pixel rendering is not an issue on retina devices. This is due to the high amount of pixels. The double pixels mean the canvas has twice the amount of space to render a font. I noticed right away that typography on a retina device is beautiful, the likes of which I set out to replicate on non-retina screens.

Here's My Solution:

I have been using this solution in a select few cases and it appears to have no detriment to a codebase. Note that this only works in Chrome on Mac OS X

First, I remove sub pixel antialiasing by using the antialiased property:

html {     -webkit-font-smoothing: antialiased; } 

Then, I take it one step further and target higher pixel density screens by using this media query fantastically crafted by Mike King, edited to only affect Chrome & Safari:

@media only screen and (-webkit-min-device-pixel-ratio: 1.25), only screen and ( min-device-pixel-ratio: 1.25), only screen and ( min-resolution: 200dpi), only screen and ( min-resolution: 1.25dppx) {     -webkit-font-smoothing: subpixel-antialiased; } 

The Rule

Custom fonts are becoming the web design standard and as more fonts are optimized for the web, less and less typefaces require sub-pixel antialiasing. This technique does not work with every typeface though and should be tested extensively. In addition, an extra sensibility is required when dealing with light type on a dark background.

If the typeface is optimized, you will have typography that shines on both retina and non-retina screens (only in Chrome on a Mac, but hey, that's better than nothing).

Check out my codepen for a demo

Keep the conversation going! We'd love to hear from you.

Categories
Tags
Author
Subscribe to General