
Mobomo webinars-now on demand! | learn more.

sharpies As a designer, there is nothing like the energy that comes from an initial kickoff with a new client. Clients visions can be overwhelming yet exciting as they eagerly spill out their advantageous ideas during that first meeting. Our job as designers is not to just create a beautiful product, but a practical one as well. You don’t know how many times I want to build the client their sexy transformer Ferrari, however, there are a few factors at play: time, money, and user needs. User story mapping is a method that our designers at Mobomo have been implementing on projects, we rely on this method in order to best organize and prioritize our client’s ideas and features.

What is User Story Mapping and its Benefits?

User story mapping is a collaborative and hands on technique; organizing and grouping user tasks on post-it notes. It’s a cheap activity that helps showcase the bigger picture of your product. It is fun to get all parties involved rather than being lost in words, documents, or spreadsheets. Moreover, everyone get’s a vision and expectations are on the same page - win win.

The goal of user story mapping is to discover your core tasks and functionalities needed to achieve the user's objectives. You will be able to see what areas you are missing as you go through the tasks. As you go through your tasks this is when you work with your team and stakeholders to prioritize your functionalities from “must have” to “nice have”. From working with your internal team to figuring out difficult and time management for each sub-task and break them later into phases to build out your roadmap. Once the site is mapped out all parties will have a better sense how the product works and set anticipation on what is expected for delivery.

It’s never too late to start

I completed my first user story map in the middle of a project because it was hard to see the bigger picture of the product. We tried screenshots, feature priority spreadsheets, Trello boards, and requirement documents. However, they all failed because no one was able to see the bigger picture. I was fed up of digging into documents, so I ordered post-its and painted three walls with post-it notes. As a result, everyone on the team could see how all the competes flow together, we were able to prioritize, backlog, and plan toward a better MVP.

How to Get Started

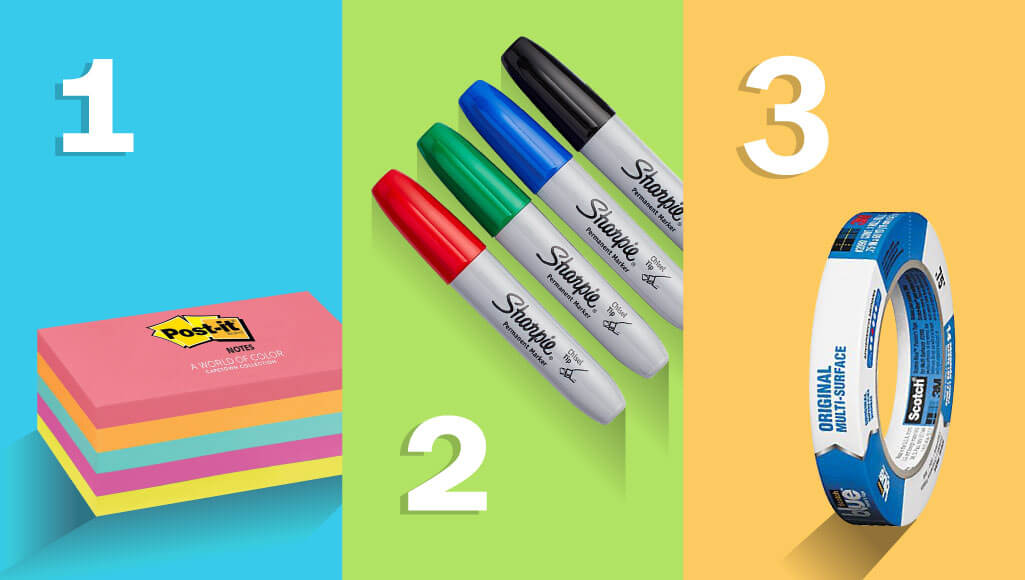
Step 1: Gather Your Materials

3in x 5in Post-It Notes in multiple colors - $7.30 @ Amazon
First you will need some post-it notes, preferable larger ones. I suggest getting the multiple colored 3x5 post-it's to give you more space to write larger and mix colors for categories and functionality. However, if you can only get your hands on the standard size ones that okay.

Chisel Tip Sharpie Markers - $4.99 @ Amazon
Next, you will need a nice dark thick marker. I recommend the sharpie chisel tips because it of the thicker lines make it easier to view from a distance. The cheapest sharpie set is the multiple colored pack of 4 markers for $5. For some reason a set of two black sharpies are over $5.. I don’t understand their pricing logic.

Blue Painters Tape - $3.59 @ staples (Optional)
An optional material that you might want is any time of painters tape. This will help you create rows to build out roll out phases. Painters tape will not damage your walls and more for giving to move around. Also, it gives helps tape up any stubborn post-it notes that will not stick.

A large wall or window
Last, you will need a large area(s) to start stick(ing) all the tasks you need. I suggest selecting an area from your or client's office that you can leave up for a long period of time. You might need multiple walls depending how large your project.

Step 2: List Out Your User Tasks & Features

After you gather your materials, spend 5 to 10 minutes writing out as many core user tasks and functionalities you can on each post-it. Think of it this way, you are more or less putting ideas to paper. Depending on what part of the process you are in, this knowledge is taken from proposals and ideas collected from your kick off, or anything you discussed in wireframes or designs. Don’t worry about trying to think of everything at once, this is just a quick brainstorming session. You will quickly see some missing features that were not discussed. Many times on boarding or logging is overlooked.

Example:
Say you are building an email application. You would start writing down all the basic and core functionality. Some post its might be straightforward while others might be very specific functionality or just wild ideas.

Read a message
Reply to message
Forward a message
Sign In
Create an Account
Search for key message
Snooze functionality
Creating folders
Sent a Message
Delete a message
Add an attachment
See what's been reviewed
Receive a notification

Step 3: Group Your Tasks/Functionality

After you have all your ideas into post-its it’s time to organize them into similar groups/themes. To do this, start placing your ideas on your wall into various groups. The benefit of sticky notes is that they can easily be moved around. Some functionality/tasks might overlap, which is fine. Just create another post-it and place it in each category. Don’t worry about it being perfect at this point. Some groups might be on their own, while others will be full of functionality, which is fine. When it comes down to groups, this will eventually become the pages that you will need to design.

Example:
Let’s use the same example as above with our email application, I start grouping the tasks by the actions that will be taking place. Anything that dealt with reading or replying to a message would be involved in viewing your inbox page. In past experiences, I learned it is better to split creating an account from signing in. Mainly because you don’t know just yet what information a user will need to set up an account and how to get them started. Therefore, you will have an area dedicated for that section.

Sign In

Receive a notification

See what's been reviewed
Read a message

Delete the message
Reply to message
Forward a message
Snooze functionality
Send a message
Add an attachment
Create an Account

Search for key message

Step 4: Label The Categories

After you categorized them in unique groups, use another color post-it to label each group by the theme. You can label it as simple as the name of the or tasks you are trying to complete.
Example:
Using the example of our email application, group similar tasks and functionally together. I group all the actions of responding to an email together. I also separated creating an account and login because from previous experience, creating an account can be multiple steps, which you don’t know what’s involved.

Onboarding
Create an Account

Login
Sign In

Managing Your Inbox (Inbox)
See what's been reviewed
Read the message

Notifications
Receive a notification

Taking Action to a Message (Message)
Send a message
Add an attachment
Delete the message
Reply to message
Forward a message
Snooze functionality

Searching
Search for key message

Step 5: Organize it into a story

After you determine the names of your categories, it’s time to order them into a story of how a user will use your site. To do this, order each category left to right on your wall on by path a user would use them. I always talk out loud as I walk through how a user enters the product to complete the primary task to completing subentry tasks like settings. For the email example, I would start with creating an account to, viewing your inbox, to receive notification, to taking action on that message, to later search for that message.

Step 6: Prioritize It

  • At this point you start to realize your ideas for the project are big and you only have a short time and   money to complete all these.
  • Under each category prioritized what you and the stakeholders feel it's necessary to nice to have. The top being a must have for the project to function out of the gate to nice to have. The goal of this it to ride the phrase “well it's all important”-
  • There might be some features and pages you know are “nice to have”
  • After you have this organized and mapped out on your wall it’s time to break some of the features into phases. I always like to bring the technology team in to bring insight on some of the functionality you want. Some ideas might be simpler then originally thought or more complex. They will help you gage what is doable in a your time line.
  • I like to bring out the painters tape and draw 2 parallel lines under the categories, and mark each rows as MVP, phase 2, and backlog.
  • From there as a team, you organize what is necessary and build a simple product to launch a deliverable where we can roll in additional features into phases.
  • As a result you create a product roadmap! Now your project managers know what’s ahead, your developers already have a sense of what is coming so they can start planning it, designers know what you expect from the beginning of the project, and know what you need to ask users about features if it's necessary or not.

Step 7: Maintain it and Reference It

Learn More About Story Mapping
I had personally never heard of user story mapping until this book “User Story Mapping” it definitely helped me understand and organize the chaos of building a project.

We are experts in design and strategy, get in touch and let's talk about your project.

Categories
Author

JustSeen dashboard

Have you heard about the newest social platform? JustSeen is a social sharing platform that allows users to create photo and video albums of their most memorable moments and invite friends and family to contribute to those albums using an app for iOS devices. It’s visual storytelling… together!

JustSeen’s primary service is social engagement; it allows users to share photos and videos through interconnected albums and, in turn, tell stories to the world.  

JustSeen partnered with Mobomo to make design and technical improvements to its existing iOS application. These improvements focused around enhanced workflows, page-by-page redesigns, and added features. They were hoping to enhance the workflow and add unique features not seen in other social sharing applications to ensure a competitive edge in the marketplace.

We proposed a Ruby on Rails backend application to handle the architecture, roles, and indexing of the application. Mobomo proposed a native iOS application.

Phase 1 consisted of:

Some of the technical and UX improvements we implemented include:

When a user logs into the application, they’ll be greeted by a visual tutorial outlining how to use specific features and workflows within the app. The icon-centric menu provides easy access to the newsfeed, search mechanism, camera, notifications, and profile sections.

Within the camera pages, a user can upload existing assets, or create new ones by allowing JustSeen to access their camera. Once a photo or video is selected, a user can create a new album, or add that asset to an existing album. Users can also add friends to contribute, add a comment, and / or share the location of the given asset.

What sets this product apart from other social sharing applications is that it empowers users to collectively contribute to the same story or album. Where other applications let users share rich stories with photos and videos, JustSeen let’s users create an immersive, inclusive experience by building rich visual experiences together, with friends.

Users benefit from this platform as they’re able to build relationships and be apart of a larger, more interconnected community - download it today and let us know what you think! 

Categories
Tags
Author

Fonts

Spoiler alert, this blog post will favor the use of custom picked typefaces, as opposed to resorting to default fonts. In fact, webfont services are widely adopted and it doesn’t appear to be a trend or something that will go away anytime soon. With that said, we have to face the fact that the vast majority of users probably will not notice any difference if a site they visit fails to load its carefully-chosen, brand-values-conveyor text font and just displays Times instead. Or, let me rephrase: they won’t consciously notice. There are reasons to support this, and I will advocate for the custom web fonts.

Language

Typefaces are basically drawings. A group of drawings (a system of shapes) representing structures that make the pieces of a code we all share. This code is the graphic form of our language. Language is engraved in our heads that when we are in front of these shapes, we cannot help to automatically decode letters, words and paragraphs. 

If we can understand the language it is typed in, there’s no way we can override the “meaning” detector. We don’t see drawings, we see words. And even if we do not know the language it will still use the Latin alphabet as the base so we will recognize the glyphs. Moreover, with other scripts we will still get the sense that “those are letters.. this is probably text”.

But this experience of getting further away from the language you know does help to prove the point: if you look at cyrillic script (e.g. Russian), you will recognize some glyphs as the letters you know, but others start to look weird, they might as well be icons (is that a chair maybe?). Let alone logographic scripts, like Kanji.

Style

So all of the above can hint at the fact that even if language and meaning come first (and that’s even a policy we can adopt for text display when developing), the perceived shapes, their style, page layout and block layouts all leave an impression on the page and in our minds. This is more obvious in the case of pictures or illustrations, as they are not hard-linked to language like the alphabet; Fonts are more ornate or illustrated type (usually for display sizes). When we look at those, the effect of the style becomes more apparent: it could be antique, retro, industrial, geometric,modern, hand-made vs. machine or digital.

In the case of text typefaces, there’s a sense of heritage that comes from their design. There’s a standard classification of type that groups the different styles by their characteristics, and often these groups represent a time in which their first specimens were created. This means you have the legacy of 15th thru 20th centuries, with all of the different stages within them.

This classification also reveals the differences that arise from the technological medium by which they were designed, and the closest or farthest they are to some original calligraphic form.

(refer to more fonts here

Hands-on

Now that we’ve come this far, I hope you won’t take the decisions that go behind a copy layout and its effects on your site or app so lightly! Remember that despite all webfonts being produced digitally, they are still mimicking the way they were produced back in the day, and they follow the tradition of typographers. New type designs with any number of features are coming out of the digital type foundries as you read this. But when it comes to text fonts they will all fall into some of the categories of the classification.

Bear in mind that text layout, in terms of leading (vertical space between lines of text), tracking (space between letters), and overall the type size and extension chosen will also affect the impression the block gives in addition to the type design itself.

So, let’s not miss the opportunity - utilize this huge toolset and let’s add a layer of meaning behind the literality.

Categories
Tags
Author

AWS logo

Mobomo, headquartered in Washington, D.C., is a premier, mobile-first web and mobile application design and engineering company that has extensive experience in working with both federal agencies and commercial enterprises. Mobomo has been recognized as a leader in cloud infrastructure and has joined the AWS Public Sector Partner Program in the Government category, launching at the 2016 re:Invent conference.

The AWS Public Sector Partner Program recognizes AWS software developers that have proven their expertise in developing solutions for government, education, and nonprofit customer missions around the world. Mobomo is proud to be one of the first companies to join this new program. We have been working with government agencies for years, helping to enable technologies and improve the way they serve and engage users.

Mobomo is unique partner in this sector because we combine web, cloud, and mobile expertise with disciplines in business strategy, interactive marketing, and systems engineering to create some of the most innovative solutions for government and commercial customers. Some work we have done, in coordination with AWS in the federal sector, include design, development, and deployment of web and mobile cloud based solutions for NASA, USGS, the U.S. Navy, the Department of State, and FDIC. See our full list here.

“We are very pleased to part of the AWS Public Sector Partner Program.  We are huge supporters of the AWS community. For years, Mobomo has utilized this platform to build, deploy and support major Federal agencies in their digital initiatives. We are excited about our partnership and look forward to building bigger and better things on AWS,” says Ken Fang, President of Mobomo.

Categories
Author

Trending 40 Red Hot Companies

We are thrilled to be named one of DC’s Fastest Growing Companies for 2016 by Trending 40!

Trending 40 is an editorial and event production of DCA Live Media LLC that recognizes and honors companies that have distinguished themselves as key contributors to DC’s community in tech, hospitality, real estate, life sciences, healthcare and non-profits. Companies are nominated and voted for by their peers from the DC corporate community.

Congrats to the other companies that made their list -

Categories
Tags
Author

Boulder meetup

As some of you know, Mobomo officially launched its Boulder presence this summer. One of the first things we wanted to do when we came to Boulder was meet our fellow techies - Boulder designers, developers, and project managers.

There is no shortage of events in Boulder that focus around the technology and startup communities. But we wanted to create our own immersive experience - one that didn’t rely too heavily on one specific craft. So, we created the Boulder Digital Experiences meetup.

We’re off to a great start! Our first meetup focused on the strategies behind the development of responsive websites and mobile applications. If you came to our Boulder Startup Week talk, you’ll be familiar with the presentation. The makeup of attendees was across the board - from biz dev to just dev.

Our second meetup focused on Agile fundamentals. This time a slew of digital project managers from across the front range came to engage in a discussion around the challenges and benefits of agile processes.

While we think of our next topic, we’d love to get some feedback from you. What are you interested in hearing about? (Did we mention our meetups are hosted at local breweries - with free beer and pizza)?

It’s been an exciting few months. While we prepare for 2017, we’re looking for a full-stack developer to join our Boulder team. If you’re interested, please shoot us a message! 

Categories
Author

Coester app

Did you hear? We recently launched a product for Coester! For starters, Coester is a full service end-to-end appraisal management company, providing excellent service with the best appraisal management technology in the industry.

Coester came to Mobomo looking to create native applications for iOS and Android. They were wanting the app to expand their appraisal management solution by offering their appraisal partners a mobile application to accept,track, and update their appraisals with CoesterVMS. The initial issues they were facing was lack of mobile support for their existing online appraisal management service. There was a clear need for native mobile platform integration to increase utilization and convenience of the partner appraisers in the field.

After our initial consultation, we hit the ground running, eager to create a solution! Our recommendation was to develop native mobile applications on both major platforms on both phone and tablet breakpoints. The need for an API became apparent due to needing to integrate applications with CoesterVMS’s existing system, which they had the capabilities and agreement to develop, alongside the Mobomo’s team application development. The strategy was to target what the key stages in the appraisal process management would be for the partner appraiser user and how a mobile platform could enhance that process, eventually becoming the user’s default chosen platform to engage with the service.

Teaming with the CoesterVMS API development team, a tiered development schedule, targeting specific components of the application, was mutually formulated and adopted in order to ensure that the API team was able to develop and provide the necessary support for the Mobomo development team.

Phase 1

The first phase was to establish the complex and specific information architecture and workflows for the appraisals as they moved through the system to the different user swimlanes. This included thorough requirements gathering, definition of project goals, and application architecture construction.

Phase 2

The second phase was to establish the end designs of the system and development to these designs in conjunction with the project requirements formerly defined.

Here are some quick steps to get started with the Coester App:

Once the user logs in, establishes account with CoesterVMS. Confirmation by email.

This was a unique project from start to finish, it is quite different because we developed the applications as modern technology for what is essentially a logistics service for the appraisal industry. The application targeted the assignment, status tracking, updating, and reporting of partner appraiser’s appraisals.

The final product that we launched will be used for CoesterVMS partner appraisers to accept, track, and update their appraisals from a native mobile platform. This will allow the users to engage with the system in real-time from the field.

Do you have a concept that you want to turn into a product? Get in touch, we love working on different challenges to create solutions!

Categories
Tags
Author

Screens of PockitShip

Recently, we launched an awesome product for PockitShip! Just to give you some background, PockitShip is an on-demand pickup and delivery company that specializes in shipping large items. They utilize technology to facilitate orders via their website, but when they wanted a product that would expand their reach and streamline the order process for all mobile users. Phase one was completed with the launch of an MVP in October 2016, their platform is on both iOS and Android applications.

PockitShip services include:

Pick Up & Delivery Services: PockitShip provides traditional moving services, as well as more unconventional shipping services like: pick up / delivery from retail stores, items purchased or sold via Craig’s List, and home-to-home delivery.

Same Location Moving: PockitShip provides in-home moves between floors or from one unit to another in the same building.

Haul Away: PockitShip will pick up items and deliver them to a landfill or donation center.

Based on the services that they offer, it only made sense that PockitShip wanted  to increase visibility and overall use of their services on a mobile platform. The primary hurdle they faced was limited reach with their singular medium for engagement. We recommended a mobile first strategy - creating mobile applications on both major platforms (iOS and Android) for drivers and customers to further increase engagement of PockitShip’s services, we worked closely with UX and development teams to deliver a sustainable, user-friendly workflow for both drivers and customers.

Phase 1

The initial phase outlined a workflow to comprehensive user stories. The development phase began in tandem with wireframe designs.

When a customer opens the application, they will find no account is necessary to begin using the application. Upon initial use of the application the customer will:

Drivers will need a PockitShip-approved account before they can begin using the application. Driver’s are able to sign up for an account within the application. The driver account sign up process includes:

For drivers that already have a PockitShip-approved account, they’ll find a similarly seamless workflow characterized by the customer application. Upon log in:

This product is unique in that it brings the traditional shipping service into a more interconnected arena, increasing the ease-of use and accessibility to the shipping industry. Allowing for an easy e-commerce solution for the shipping industry. The final product will be used for placing and tracking shipment (customers) and moving items (drivers).

Do you have an e-commerce issue you can't seem to solve? Get in touch for a free consultation.

Categories
Tags
Author

Ionic 2 applications come with quite a bit of theming built in by default, like utility attributes, Sass variables, and even a grid layout based on flexbox. But, there are times when you may need to get even more granular, using modular CSS utility classes. This is where Basscss can help. Basscss is a low-level CSS toolkit, giving app developers an additional layer of tools when it comes to styling their applications. Let’s take a look at how you could setup Basscss to work with your Ionic 2 project.

Dependencies

First, you need to have the dependencies installed. You’ll need npm, and after you have npm installed, you can use it to install Cordova and Ionic:

npm install -g cordova

npm install -g ionic

Next, create an Ionic app using Ionic 2:

ionic start myNewApp --v2

You can then open the myNewApp directory, and check that your app shell is running with:

cd myNewApp

ionic serve

Basscss Install

We’re going to use the Sass version of Basscss, so it will integrate with Ionic’s existing Sass setup nicely:

npm install basscss-sass --save

If you open the package.json file in your project root, you’ll now see a line for basscss-sass in the dependencies block. If you open the node_modules/basscss-sass/scss directory, you’ll find a whole bunch of modules, and one root file named “basscss.scss” that imports the modules.

How do we go about importing these files into our Ionic app? Ionic 2 apps use node-sass for compilation, which we can determine by opening the file at:

node_modules/@ionic/app-scripts/config/sass.config.js

If you open this file, you’ll see a block for “includePaths”, which is how we can specify additional directories to include during compilation. However, we don’t want to edit this file directly; it’s in our node_modules directory and we wouldn’t want our changes to be overwritten, nor is this directory typically included in repos.

Instead, copy the entire contents of the sass.config.js file, and paste them into a new file located in your app root, in a new directory named “config”:

config/sass.config.js

Once you have the default sass.config.js file, add a new line to the includePaths array that points to the new basscss-sass directory:

node modules

Next, we need to tell our app about our new custom config file. Back in our app’s package.json file, add a new block called “config” that specifies the location of our new config file:

Ionic-sass

We can now import the Sass modules like normal in our app/app.scss file:
sass-modules

To test that everything is working, make sure you’ve launched your app in a browser:

ionic serve

And then add one of the Basscss classes to the H2 element in src/pages/home/home.html:

h2 code

You’ll see the browser window automatically refresh with the header element italicized.

The precedence with which we should use all the available styling options to make our app’s CSS as modular as possible should likely be:

Hopefully this helps you get setup with one of the most flexible modular CSS architectures for your Ionic 2 projects!

Categories
Author

code

You know the old saying: “This is how the world ends: not with a bang, but with a misplaced DROP TABLE.” Working directly with Drupal 7’s database is an arduous task at best.  It’s a sprawling relational system and it uses many space and memory saving tricks to be as speedy as possible.  Thankfully, there is a robust system of functions built into Drupal to help you change almost any setting from code--perfect if you want to automate changes upstream and features doesn’t do it for you.  Let’s go over a situation in which you may have been utilizing some of these functions.

Let’s say you finished your product (congratulations!), launched, and are onto fixing bugs and planning exciting new features for the future.  You’re knocking out bugs left and right like some high-flying Drupal ninja and you discover that using a field collection with conditional fields causes the field collection data to not save and all of your metadata is getting erased when certain conditions are fired.  With Cthulhu's hot breath on your neck, you talk to the client and realize a ray of hope: you don’t actually need a field collection there, a normal set of Drupal fields will do.  How do we go about creating the new fields, copying existing data, and deleting the old fields?

The first thing we do is create the new fields and attach them.  For this, we’ll need two functions: 'field_create_field()' and 'field_create_instance()'.  Both of these take an array of settings: field_name and type are we need for creating the field (also cardinality if you want to have multiple values for the field), field_name, entity_type, and bundle are required for creating the instances, though you will likely also want label, or it will otherwise default to the machine name.  So, we should have something that looks like this:


$name = [
  ‘field_name’ => 'photographer_name',
  ‘type’ => ‘text’,
];
field_create_field($name);

$instance = array(
  'field_name' => $name['field_name'],
  'entity_type' => node,
  'bundle' => article,
  'label' => 'Name',
);

field_create_instance($instance);


If you go check out node/add/article, you should see your new text field there.  Congrats!  Next, we need to get the data from the old fields and copy it into our new field.  For this, we’ll rely on the nifty function 'entity_load()'.  This takes two arguments, bundle name and an array of ids.  Since we are getting field collection items, we know the bundle name is ‘field_collection_item’.  We’ll need the IDs, but we’ll also need the field collection value that references the fields in each collection for later, so we’ll get them both at once.  It might be tempting to use 'entity_load()' to get them, but in this case you are quite safe using straight SQL, which also happens to be significantly faster.  That looks like this:


$entity_ids = array();
$field_collection_ids = array();
// Select the field collection id and the attached entity id from the db.
$query = db_query('SELECT field_producer_value, entity_id FROM field_data_field_producer');
$results = $query->fetchAll();
// Separate the ids
foreach ($results as $result) {
  $field_collection_ids[] = $result->field_scald_producer_value;
  // We need to reference the entity ID by the field collection value for simplicity later
  $entity_ids[$result->field_scald_producer_value] = $result->entity_id;
}
// It’s possible that you might get duplicate Field Collection IDs, so we make sure they are all unique
$field_collection_ids = array_unique($field_collection_ids);
// Load all of the field collection entities.
$field_collection_results = entity_load('field_collection_item', $field_collection_ids);


Now that we have all of the entity ids and field collection ids, we can get to the fun part: copying data! (You know you have been doing this too long when that is exciting.) What we want to do is loop through the field collection ids, load the the entity (that has the new field on it) by the id associated with the collection, copy the data from the collection to the new field, and save.  It seems like a lot, but it’s fairly simple:


foreach ($field_collection_ids as $field_collection_id) {
  // Load the entity the field collection is attached to
  $entity = entity_load('node', array($entity_ids[$field_collection_id]));
  // Copy the data from the collection field to the new field
  $entity[$entity_ids[$field_collection_id]]->photographer_name['und'][0]['value'] =
  $field_collection_results[$field_collection_id]->field_producer_name['und'][0]['value'];
  // Save!
  entity_save('node', $entity[$entity_ids[$field_collection_id]]);
}

A word of warning: depending on how many entities you are processing, this could take a long time.  As of Drupal 7.34, there is a memory leak in entity_save()--this means that each save will take slightly longer than the last. This is not a problem if you have only a few hundred fields, but when you get up into five and six digits, this script will take many hours. At that point, unless you have the time (and/or can run the script as a process in the background), you might want to consider investigating other options.

Okay, so the data is copied, the nodes are saved, and the elder gods have hit the snooze button.  Last thing you have to do is delete the old field.  We’re not going to do that, at least not yet. Instead, we’re going to delete the instances of the fields.  This will preserve the old field collection data, but remove the fields from the edit forms. This way, if something goes wrong, you don’t lose the data in the old fields and can try again if needed. You can go back at a later time, if you wish, after you have confirmed that everything is correct and delete the fields. Luckily, this is the easy part:


$instance = array(
  'field_name' => 'field_scald_producer',
  'entity_type' => node,
  'bundle' => article
);
field_delete_instance($instance);


And that’s it, crisis averted!  You no longer lose data and no longer have to worry about supernatural madness and death!  All you need to do now is run your script upstream with 'drush php-script' and watch the magic.

This sort of scripting can be daunting at first glance, but Drupal’s rich entity API can keep you from pulling out your hair or inadvertently causing an otherworldly alien intelligence from rising from the deep.  There are many more functions to take advantage of, and just about anything you can set with a click in the interface you can set in code, perfect for automation or locked down production environments.

Happy Drupaling !

Categories
Author
Subscribe to