Mobomo webinars-now on demand! | learn more.

some text

Last week, I found myself in an interesting Twitter discussion with my friend Brad Frost. Centered around home screen icons for mobile, Brad was lamenting on the lack of up-to-date, clean cut resources for them.

I couldn't agree more! In fact, over the last few weeks, that has been my baby; to create a simplistic guide for home screen icons. Initially, it was just an internal team resource, but now I'd like to share it with you. And after a lot of testing and research, here is what I came up with...

TL;DR: People are overdoing it. You can add great looking home screen icons for iOS and Android with a single image and two lines of code. Here's the Github Repo with the markup and a test image.

From Flappy Birds to the "Gloss" Effect

Before the days of App Stores and Flappy Birds, when the iPhone was first unveiled, there were no third party apps. Your home screen was a fixed set of icons and there was virtually no customization, not even rearranging capabilities.

The following year (still talkin' iPhone OS version 1.1.3 here) Apple added the ability to add (or bookmark) "Web Clips" to your home screen. Rearranging was finally implemented for apps and web clips on up to 9 home screens (hot dog!) - still no app store though.

Along with this feature, Apple provided the ability for developers to specify custom icons for "Web Clips" called a "Web Clip Icon." This could be accomplished in two ways; by adding the file to your root folder via predefined naming conventions or by adding a <meta> tag to the <head> of your document. The image was required to be an 8-bit (no transparency) square PNG. iOS automatically rounded the corners and added that sexy "gloss" effect icons. However, you could disable the gloss with a different naming convention in your file or meta tag.

Many iterations of the iPhone and iOS later, you still have access to this feature as you did way back in iOS 1.1.3. Additionally, Mobile Safari for iOS 7 uses the web clip icon when displaying your bookmarks. Oh, and home screen bookmarks are now available in Chrome (31+) for Android as well. Long story short, this is something everyone should be adding. No one wants to see the default icon.

If you look up documentation on these icons though, it will boggle your mind! Some of the sources out there recommend up to seven different size icons with varied meta tags for each. After a ton of experimenting, I found this to be totally unnecessary. iOS and Android are quite adept to scaling the icon to its necessary size without making a ton of versions or adding loads of code to the head of your document.

The Simplicity of Modern Touch Icons

Now with all that said, here are my simple steps for modern touch icons.

Step 1: Make It

Make your icon. My preference is 512x512px but as long as its at least 152x152px, you'll be good. In addition, double check it's PNG 8-BIT with no transparency. Note: It won't work if you use PNG-16 or have transparency enabled. Finally, make it square, the OS is going to round the corners for you. Save your file as touch-icon.png That's it.

Step 2: Add Code

Add these two lines of code to the head of your HTML document. The first is for Android, the second is for iOS.

<link rel="shortcut icon" href="touch-icon.png">
<link rel="apple-touch-icon-precomposed" href="touch-icon.png">

Notes:

  • iOS 7 doesn't show gloss regardless of whether you use "precomposed" or not. My recommendation? Use it. It'll ensure your icons have a consistent look across all iOS versions.
  • If you use Apple specific file names, you can simply plunk the images in your site's root folder and it will "just work" on iOS devices, however I prefer the pre-composed method. You already have to add a tag for Android, so you might as well keep them together. Also, there's a chance you project won't always be in the root folder of a site.
  • Bonus

    By default, both iOS and Android use the page's <title> tag for the bookmark title (you can still edit before saving them). However, if you're feeling crazy and want to add another line of code, you can use this undocumented tag, from Apple, to set a different default title.

    <meta name="apple-mobile-web-app-title" content="My App Name">

    Technically this tag is for full screen web apps (a post for another day), but it works with regular web clip bookmarks as well.

    Keep the conversation conversation going! We'd love to hear from you.

    Categories
    Author

    Intridea is thrilled to announce our newest office in Seattle, Washington!

    With offices in New York, San Francisco, and Washington DC, setting up shop at /dev/local was the perfect spot for our fourth location. At /dev/local we'll be delivering in the same big way: taking great ideas and crafting them into inspired products.

    Want to stop by and say hello? Feel free to shoot us an email! Also, we are always looking for talented folks, so if you're in the Seattle area, let us know. We'd love to meet you.

    Inside /dev/local

    We look forward to being active participants in the local Ruby, JavaScript, and software development communities. Plus, with absurdly awesome coffee, and all the great food and culture--the Fremont neighborhood is hard to beat!

    Categories
    Author

    Alt text

    Boxen is an awesome tool for automating dev environment setups and configuration on OS X. Here at Intridea, we are huge Boxen fans. Not only is it a fairly straightforward process, the entire set-up can be achieved with a single command!

    Why we love it.

    Boxen comes with an addon project called boxen-web to facilitate quick and painless installs. At Intridea, when someone receives a new company laptop, they can visit https://intridea-boxen-web.herokuapp.com/, which will OAuth with their github account and display a command to be run in the terminal.

    This command will install Boxen (and its dependencies), taking approximately 30 minutes to fully install. The end result? Without any customization, you get a machine set up with rbenv, a few ruby versions, node, git, nginx, and homebrew!

    Github also provides many ready to use puppet modules under the Boxen Organization on Github. They are all named starting with puppet-*. If you can’t find the package you want under the Boxen organization, using the search works as well.

    The learning curve.

    Now, in order to take full advantage of Boxen and customize it to your organization's needs, you’ll need to learn Puppet. It’s a bit of a learning curve; standardizing your configuration and learning another language. However, while Boxen's documentation is quite sparse, reading up on the code and researching other Boxen forks will help get you up to speed.

    In addition, Boxen has a great example of how to package software so that puppet can install it here; a huge help when creating my puppet module for Drobo.

    Finally, keep in mind Boxen packages tend to be Github specific. For instance, the puppet-nginx module includes a landing page for Github employees. Initially, when utilizing this package, I had expected a vanilla nginx, similar to running brew install nginx. However, due the custom site in Github's puppet-nginx module, this wasn’t the case. After some troubleshooting, removing puppet-nginx and telling Puppet to install nginx via homebrew did the job.

    Quick Tip: Boxen is rather opinionated, and keeps its own homebrew install in /opt/boxen/homebrew, while homebrew installs to /usr/local by default. The quick fix for this is to use brew --prefix in your scripts instead of hard-coding /usr/local.

    Remember, it’s only a tool.

    Alright, so we’ve gone over why Boxen is great. However, not only does it streamline the dev machine set up (although, lets be honest having 90% of what you need for ruby dev is enough in itself!), but it’s customizable too.

    With Boxen, you can add organization, project, and user level customizations. Just keep in mind, when customizing you’ll need to rewire your thought process. Instead of changing your immediate environment, you’ll need to train yourself to edit your Boxen configuration and then run the updated boxen command.

    Conclusion

    Boxen; the one-stop shop for ruby development on OS X. Streamlining dev environment setups and configuration, Boxen is an awesome asset to any company. It is straightforward, quick, and virtually painless.

    Got any tips or tricks for using Boxen? Send us a tweet or message us on Facebook!

    Categories
    Tags
    Author

    With the proliferation of client side apps and frameworks, testing strategies for writing client side code has become a major necessity. However, unlike most of the ruby community, effort in this department had been lacking…

    Working on apps with zero client side tests, creates a series of unnecessary hurdles. It limits the developers ability to perfect the code, transfer knowledge to other developers, even pinpoint needed improvements.

    Over the last few years though, I’ve developed a few techniques to counteract this lack of testing; by creating custom unit tests for Backbone.Marionette applications.

    Notes on Backbone.Marionette testing:

    • Coffeescript will be utilized for the backbone code and tests.
    • Tests will be written using the Jasmine testing library
    • Backend for this app is a simple rails app
    • Jasminerice gem will compile coffeescript jasmine tests to javascript for browser.

      The Application:

      Alright, so you’ve got your requirements to build a very exciting to-do list application:

    • Ability to add new to-do items
    • Ability to mark to-do items as done
    • Ability to delete to-do items
    • For the sake of brevity, I will assume you have the basic setup and boot strap of a backbone application and are ready to render the view to your root route /.

      To quickly illustrate this, see index.html.erb file below. Notice it bootstraps my Todo items from the server into the ToDoApp backbone application.

      <div id="todos"></div>  <script type="text/javascript">   $(function() {      window.MyApp.start({todos: <%= @todos.to_json.html_safe %>});   }); </script> 

      Also, below is the main todo_app.js.coffee file for my ToDoApp backbone application:

      #= require_self #= require_tree ./templates #= require_tree ./models #= require_tree ./views #= require_tree ./routers  window.ToDoApp =   Models: {}   Collections: {}   Routers: {}   Views: {}  window.MyApp = new Backbone.Marionette.Application()  MyApp.addRegions   main: "#todos"  MyApp.addInitializer( (options) ->   todoView = new ToDoApp.Views.TodoCollectionView     collection: new ToDoApp.Collections.TodosCollection(options.todos)   MyApp.main.show(todoView) ) 

      As you can see, I am simply bootstrapping Todo objects from the server and rendering a TodosCollectionView into the #todos div.

      Test-Driving Functionality:

      Now to test drive our TodoCollectionView...

      Starting with the tests, the functionality of this view enables you to create a new Todo item as well as render it. Thus, we can write tests assuming there will be some sort of text field and add button to create the item.

      Here’s a test file below:

      describe "ToDoApp.Views.TodoCollectionView", ->   describe "rendering", ->     describe "when there is a collection", ->       it "renders the collection", ->         collection = new ToDoApp.Collections.TodosCollection([           {id: 1, title: 'make example test', done: false}           {id: 2, title: 'make example work', done: false}         ])         view = new ToDoApp.Views.TodoCollectionView(collection: collection)         setFixtures(view.render().$el)         expect(view.children.length).toEqual(2)      describe "when there is not a collection", ->       it "renders the collection", ->         collection = new ToDoApp.Collections.TodosCollection([])         view = new ToDoApp.Views.TodoCollectionView(collection: collection)         setFixtures(view.render().$el)         expect(view.children.length).toEqual(0)    describe "events", ->     describe "click .add", ->       it "adds a new model to the collection", ->         view = new ToDoApp.Views.TodoCollectionView(collection: new ToDoApp.Collections.TodosCollection())         setFixtures(view.render().$el)         $('.add').click()         expect(view.collection.length).toEqual(1)        it "sets the new model's title from the text field", ->         view = new ToDoApp.Views.TodoCollectionView(collection: new ToDoApp.Collections.TodosCollection())         setFixtures(view.render().$el)         $('#new-todo').val("This is new")         $('.add').click()         expect(view.collection.models[0].get("title")).toEqual("This is new")        it "clears the value in the text field", ->         view = new ToDoApp.Views.TodoCollectionView(collection: new ToDoApp.Collections.TodosCollection())         setFixtures(view.render().$el)         $('#new-todo').val("This will be cleared")         $('.add').click()         expect($('#new-todo').val()).toEqual("") 

      When we run these tests (on the command line, for ease of copy + paste) we get:

      Run all Jasmine suites Run Jasmine suite at http://localhost:57702/jasmine Finished in 0.009 seconds ToDoApp.Views.TodoCollectionView   rendering     when there is a collection       ? renders the collection         ? TypeError: 'undefined' is not a constructor (evaluating 'new ToDoApp.Views.TodoCollectionView({ > [#]             collection: collection > [#]           })') in http://localhost:57702/assets/spec.js (line 16416)     when there is not a collection       ? renders the collection         ? TypeError: 'undefined' is not a constructor (evaluating 'new ToDoApp.Views.TodoCollectionView({ > [#]             collection: collection > [#]           })') in http://localhost:57702/assets/spec.js (line 16427)   events     click .add       ? adds a new model to the collection         ? TypeError: 'undefined' is not a constructor (evaluating 'new ToDoApp.Views.TodoCollectionView({ > [#]             collection: new ToDoApp.Collections.TodosCollection() > [#]           })') in http://localhost:57702/assets/spec.js (line 16439)       ? sets the new model's title from the text field         ? TypeError: 'undefined' is not a constructor (evaluating 'new ToDoApp.Views.TodoCollectionView({ > [#]             collection: new ToDoApp.Collections.TodosCollection() > [#]           })') in http://localhost:57702/assets/spec.js (line 16448)       ? clears the value in the text field         ? TypeError: 'undefined' is not a constructor (evaluating 'new ToDoApp.Views.TodoCollectionView({ > [#]             collection: new ToDoApp.Collections.TodosCollection() > [#]           })') in http://localhost:57702/assets/spec.js (line 16458) 5 specs, 5 failures Done. Guard::Jasmine stops server. rake aborted! Some specs have failed 

      We got one hundred perecent failure because we haven't created our TodoCollectionView yet. Let's do that:

      class ToDoApp.Views.TodoCollectionView extends Backbone.Marionette.CompositeView 

      Quick note: The backbone model and collection (Todo and TodosCollection) were pre-made. Thus, since there is no functionality outside of backbone, and therefore no tests, I'll illustrate here...

      class ToDoApp.Models.Todo extends Backbone.Model   paramRoot: 'todo'    defaults:     title: null     done: null  class ToDoApp.Collections.TodosCollection extends Backbone.Collection   model: ToDoApp.Models.Todo   url: '/todos' 

      Now re-run the tests.

      Run all Jasmine suites Run Jasmine suite at http://localhost:57732/jasmine Finished in 0.011 seconds ToDoApp.Views.TodoCollectionView   rendering     when there is a collection       ? renders the collection         ? TemplateNotFoundError: Cannot render the template since it's false, null or undefined. in http://localhost:57732/assets/spec.js (line 14154)     when there is not a collection       ? renders the collection         ? TemplateNotFoundError: Cannot render the template since it's false, null or undefined. in http://localhost:57732/assets/spec.js (line 14154)   events     click .add       ? adds a new model to the collection         ? TemplateNotFoundError: Cannot render the template since it's false, null or undefined. in http://localhost:57732/assets/spec.js (line 14154)       ? sets the new model's title from the text field         ? TemplateNotFoundError: Cannot render the template since it's false, null or undefined. in http://localhost:57732/assets/spec.js (line 14154)       ? clears the value in the text field         ? TemplateNotFoundError: Cannot render the template since it's false, null or undefined. in http://localhost:57732/assets/spec.js (line 14154) 5 specs, 5 failures Done. Guard::Jasmine stops server. rake aborted! Some specs have failed 

      At this stage, while all failed, we are getting better errors. Let’s try giving it a template to render (JST was utilized for template):

      class ToDoApp.Views.TodoCollectionView extends Backbone.Marionette.CompositeView   template: JST['backbone/templates/todos/index'] 

      and the template file:

      <div id="new">   <input id="new-todo" type="text" placeholder="new item" />   <button class='add'>Add</button> </div>  <ul id="todos"> </ul> 

      As you can see, I skipped ahead and put in the text field, add button, and container for the Todo items. Now, let's rerun the tests.

      Run all Jasmine suites Run Jasmine suite at http://localhost:57764/jasmine Finished in 0.026 seconds ToDoApp.Views.TodoCollectionView   events     click .add       ? adds a new model to the collection         ? Expected 0 to equal 1.       ? sets the new model's title from the text field         ? TypeError: 'undefined' is not an object (evaluating 'view.collection.models[0].get') in http://localhost:57764/assets/spec.js (line 16467)       ? clears the value in the text field         ? Expected 'This will be cleared' to equal ''. 5 specs, 3 failures Done. Guard::Jasmine stops server. rake aborted! Some specs have failed 

      Nice! Looks like a couple of our tests passed this time; namely the tests about rendering the view with a collection. However, our add button clicking tests still failed.

      One at a time, let's make them pass. First priority, making sure clicking the add button adds a model to the collection:

      class ToDoApp.Views.TodoCollectionView extends Backbone.Marionette.CompositeView   template: JST['backbone/templates/todos/index']    ui:     newTitle: "#new-todo"    events:     "click .add" : "addNewTodoItem"    addNewTodoItem: ->     @collection.create(new ToDoApp.Models.Todo(title: @ui.newTitle.val())) 

      Re-run the tests.

      Run all Jasmine suites Run Jasmine suite at http://localhost:57808/jasmine Finished in 0.027 seconds ToDoApp.Views.TodoCollectionView   events     click .add       ? clears the value in the text field         ? Expected 'This will be cleared' to equal ''. 5 specs, 1 failure Done. Guard::Jasmine stops server. rake aborted! Some specs have failed 

      Cool, only one failure left, and it looks like simply clearing the input field, after creation of a new Todo item, should do the trick. Here’s the code for that:

      class ToDoApp.Views.TodoCollectionView extends Backbone.Marionette.CompositeView   template: JST['backbone/templates/todos/index']    ui:     newTitle: "#new-todo"    events:     "click .add" : "addNewTodoItem"    addNewTodoItem: ->     @collection.create(new ToDoApp.Models.Todo(title: @ui.newTitle.val()))     @ui.newTitle.val("") 

      Re-run our tests.

      Finished in 0.025 seconds ToDoApp.Views.TodoCollectionView   rendering     when there is a collection       ? renders the collection     when there is not a collection       ? renders the collection   events     click .add       ? adds a new model to the collection       ? sets the new model's title from the text field       ? clears the value in the text field 5 specs, 0 failures Done. 

      Hoorah, all green!

      Alright, only one more housekeeping task. If you were following along, you may have noticed the application doesn’t work as expected in browser view. This is because we have not declared what the ItemView for this collection is supposed to be...

      Let's write a test that drives this functionality out:

      it "renders TodoViews as the itemViews", ->   collection = new ToDoApp.Collections.TodosCollection([     {id: 1, title: 'make example test', done: false}   ])   view = new ToDoApp.Views.TodoCollectionView(collection: collection   view.render().$el   expect(view.children.first().constructor.name).toEqual("TodoView") 

      Re-run the tests that fail.

      Expected 'TodoCollectionView' to equal 'TodoView'. 

      Next, lets make sure we set the ItemView property of our collection view (as well as the itemViewContainer property for good measure):

      class ToDoApp.Views.TodoCollectionView extends Backbone.Marionette.CompositeView   template: JST['backbone/templates/todos/index']   itemView: ToDoApp.Views.TodoView   itemViewContainer: "#todos"    ui:     newTitle: "#new-todo"    events:     "click .add" : "addNewTodoItem"    addNewTodoItem: ->     @collection.create(new ToDoApp.Models.Todo(title: @ui.newTitle.val()))     @ui.newTitle.val("") 

      Re-run our tests.

      Expected 'TodoCollectionView' to equal 'TodoView'. 

      Oh no! We get the same failure, what happened? Well, we never made our TodoView view. Let's do that now (see below):

      View:

      class ToDoApp.Views.TodoView extends Backbone.Marionette.ItemView   template: JST['backbone/templates/todos/_todo']   tagName: 'li' 

      Template:

      <p><%= title %></p> <p><%= done %></p> 

      Cool, now let's re-run our tests.

      Finished in 0.026 seconds ToDoApp.Views.TodoCollectionView   rendering     when there is a collection       ? renders the collection       ? renders TodoViews as the itemViews     when there is not a collection       ? renders the collection   events     click .add       ? adds a new model to the collection       ? sets the new model's title from the text field       ? clears the value in the text field 6 specs, 0 failures Done. 

      Ta-da! 100% success! We now have a small backbone app, fully tested and fully functioning, that allows you to create and list todo items.

      Want to learn more about client-side testing? Let us know! We'd love to hear from you.

    Categories
    Author

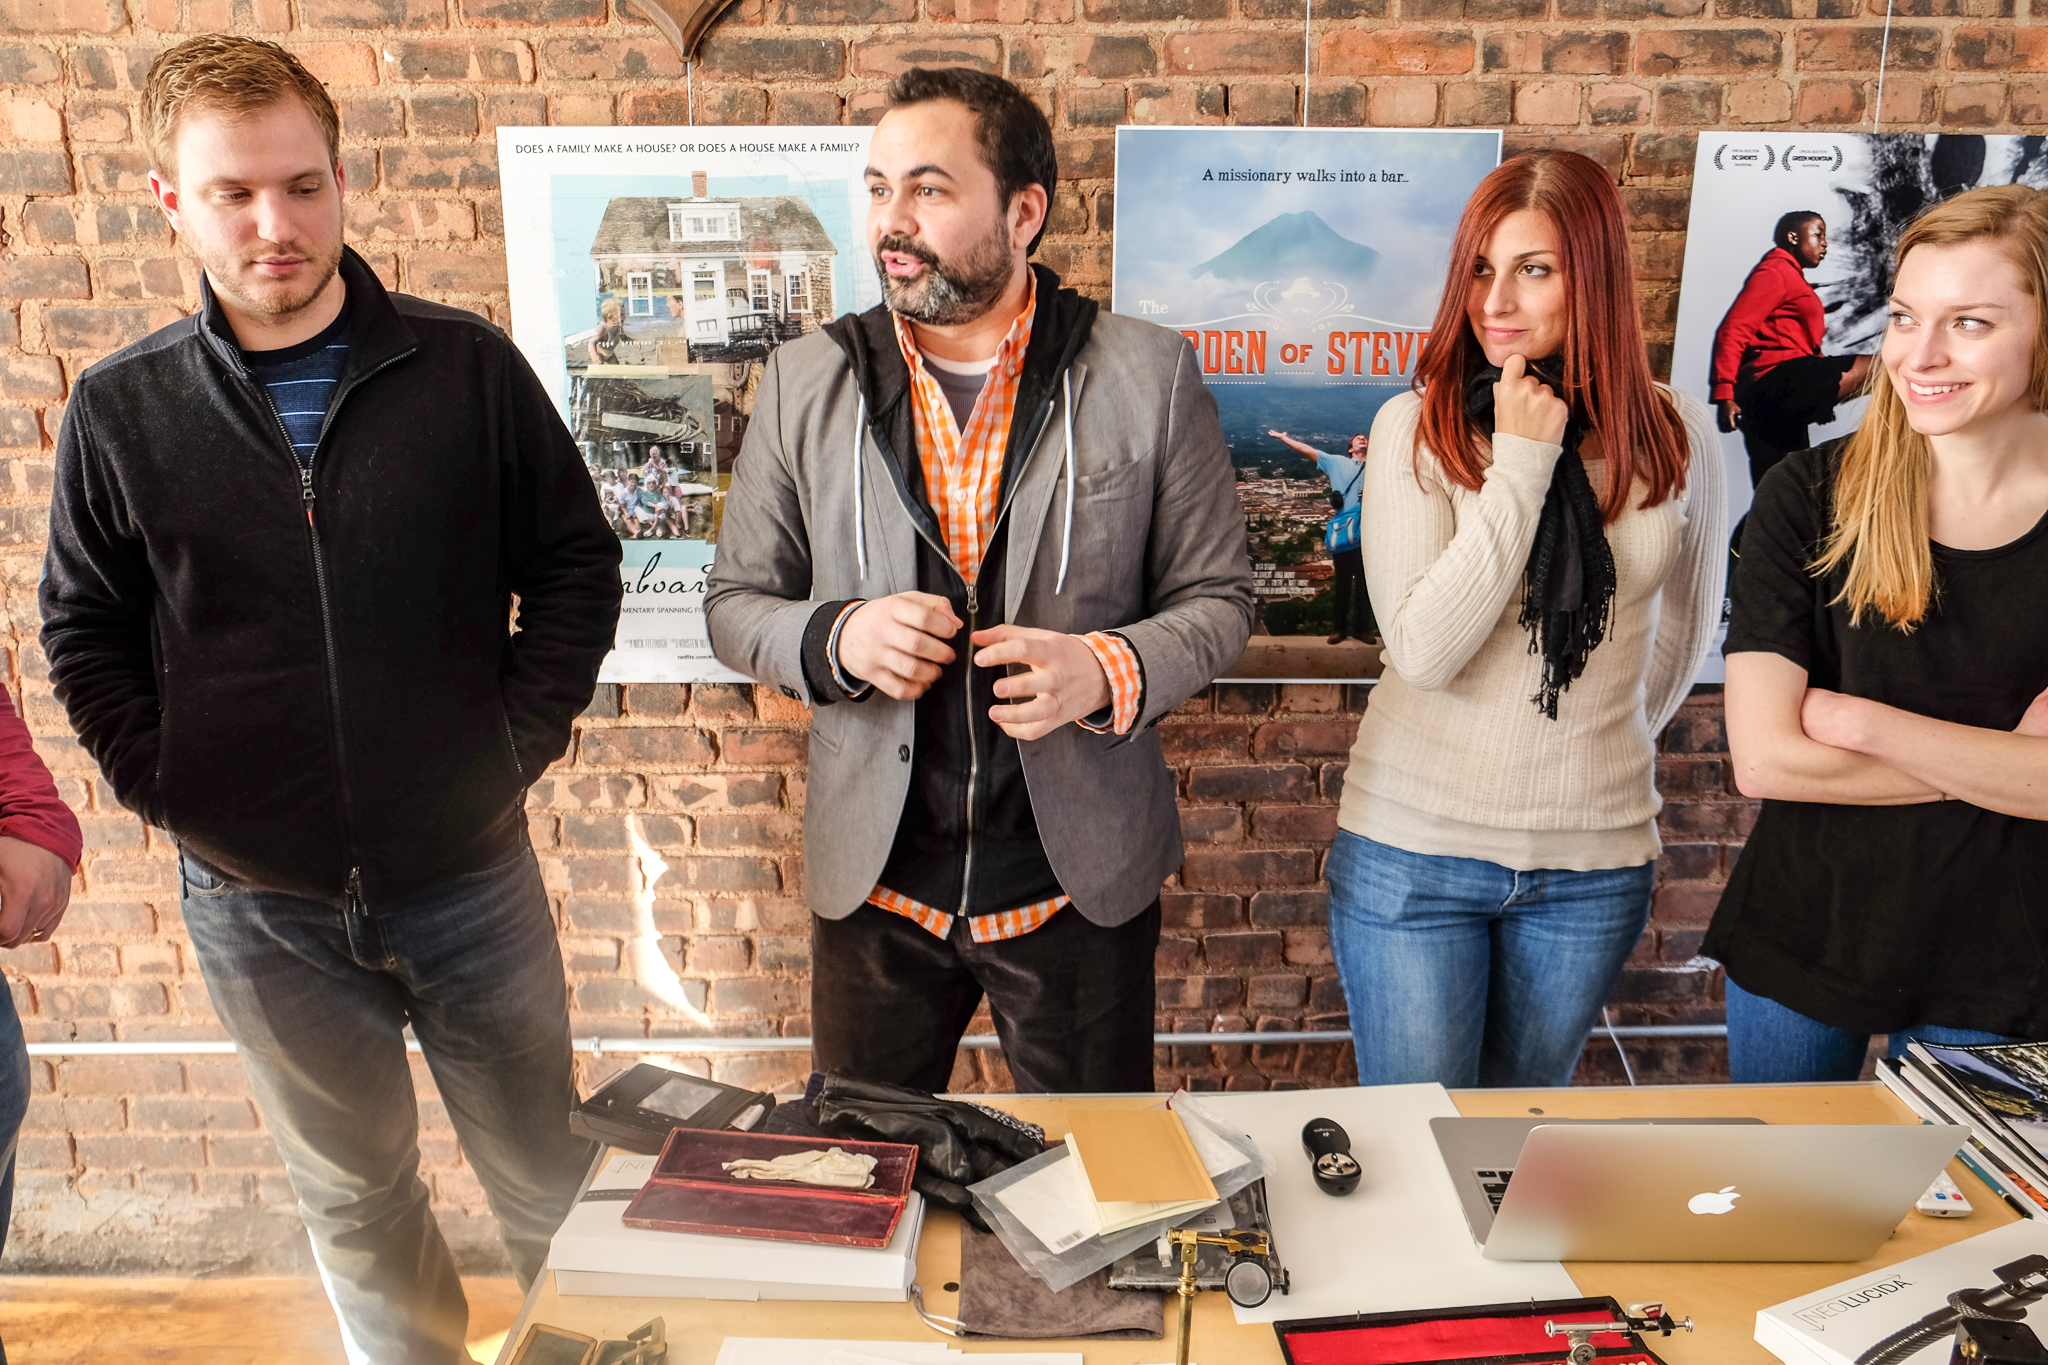
    Thanks to the kickstarter campaign NeoLucida, Intridea had the chance to play with 19th century drawing tools last week! As a fully distributed team, we often find excuses to get together, and the Neolucida was the perfect reason for such an event.

    Brooklyn became our mecca for this workshop and with a beautiful studio, awesome location, and great instructor, our one day workshop was rather idyllic.

    With alligator heads, My Little Pony, and flowers for inspiration, Intridea’s UX team quickly took to the NeoLucida; a tool composed of lenses and mirrors that when angled properly superimpose your subject onto paper.

    Alt text

    The icing on the cake though, was having NeoLucida’s brainchild conduct our workshop. Based out of Chicago, Pablo made a special trip for Intridea’s workshop and we couldn’t have had a better instructor. With a background in media archaeology and a passion for visual culture and imaging technologies, Pablo’s excitement was infectious and his insight into the NeoLucida was invaluable.

    Alt text

    It was a great experience and ending our day at Brooklyn’s fine establishment, the Spritzenhaus sealed the deal.

    Special thanks to all the folks at 67 West St. Studio!

    Categories
    Author

    Trying to get up to speed with D3 can be a daunting task. A quick google search will reveal hundreds of different starting points, almost all of which involve writing great swaths of code in order to build even the most basic of charts. Don't believe me? Here's the official example for a basic line chart. D3's biggest barrier to entry is its biggest strength - the flexibility that it provides to create nearly any sort of visualization that you can imagine.

    In order to help foster good practices (by creating re-usable charts) and to give back to a community that is so willing to share its knowledge, Intridea has released a library that will help you get started much more easily: the D3 Fakebook. With just a few lines of code, you can easily render that same bar chart:

    // From the D3 Basic Line Chart example: http://bl.ocks.org/mbostock/3883245 d3.tsv('examples/data/aapl_stock.tsv', function(error, data) {   var chart = new D3Fakebook.TimeScaleLineChart('#singleLine', {     data : data,     valueName : 'close'   });   chart.render(); }); 

    Basic line chart

    Easy as pie.

    Getting Started

    There are a few ways you can start using this library today: the first is that you can install it using bower ($ bower install d3-fakebook), which will pull down the dependencies (underscore.js and d3). You can also grab the files directly - there are both compiled JavaScript files as well as CoffeeScript.

    Once you have the files loaded in your browser, you can access the different chart types under the D3Fakebook namespace. Each chart type takes a set of options that allows you to configure.

    Wait - "Fakebook"? What’s up with the name?

    The concept of a "fakebook" comes from Jazz - back in the 1950's, popular Jazz songs (also known as standards) were often compiled in to collections of books. Each song's transcription would have chord changes and the main melody would be written out, but not the whole song, since the musicians would make each their own by improvising on top of the chord changes.

    Our goal with the D3 Fakebook is to do precisely that - give you a starting point to make amazing, beautiful visualizations that are purely your own. The Fakebook gives you a starting point and some guidance, but doesn’t force you to follow any specifically set path.

    Follow the Changes

    This is a living library, something we're using in our own projects (check it out in action on http://humanprogress.org) and though it's a bit rudimentary right now, we'll be adding more charts in the near future. If you want to help out, or if you've found a bug, feel free to submit a pull request on Github, and we'll incorporate it as soon as possible!

    A few more roadmap items: we intend to add AMD support, compiled JavaScript modules (in addition to making the existing CoffeeScript files into actual modules), and nicer transitions.
    Keep the conversation going! We'd love to hear from you!

    Categories
    Author

    Alt text

    Over the last few months, Intridea has worked on several projects revolving around charts, maps, and interactive stats. Learning how to effectively display these aspects, both at a functional and beautiful level, is a challenging task. However, like the old saying goes, necessity is the mother of invention, and these projects taught us some unique ways to streamlining the overlay process...

    The Challenge: Effectively display data stats and implement maps with a highlight overlay for maps to draw attention to one and/or a few specific countries.

    The Solution: After some research, we chose Mapbox as the base map, enabling easier customization in the shaded area/border/ocean colors, and for the overlay, utilizing d3 to add a highlight layer. Here’s the 4 step process:

    Step 1: Initiate Mapbox map on specify div:

    var map = L.mapbox.map("country_map", ‘your_mapbox_map_id');  

    Step 2: Add a base layer to the map with custom styles:

        var layer = L.geoJson(null, { style: { fillColor: '#c6bbaf', fillOpacity: 0.5, weight: 0, color: '#ffffff', opacity: 1 }})     map.addLayer(layer)  

    In order to complete Step 2, we created detailed geojsons for each country, either by generating from a shapefile or creating manually from http://geojson.io.

    Step 3: Use d3 to load country geojson and set bounds to country area:

        var json_file = "/assets/" + country_isocode + ".json"     d3.json(json_file, function(error, data){            layer.addData(data.features);            map.fitBounds(layer.getBounds());     } 

    Step 4: Add a marker on country capital and create an anchor to correctly position display:

               var latLng = L.latLng(lat, lng);       var pinAnchor = new L.Point(8, 8);       var pinAnchor = new L.Point(8, 8);       var icon = L.icon({         iconUrl: "/assets/icon-star.png",         iconAnchor: pinAnchor       }); 

    Resources:

    Categories
    Author

    Alt text

    Time. The most common excuse (and legitimately so) for avoiding open source contribution. Finding time outside normal work hours is difficult and the idea of grinding it out, post work day, isn't always appealing.

    There's a perception that open source is a huge undertaking, but what if I told you it didn’t have to be? That there are ways to contribute to open source without absorbing your entire weekend? Don't believe me? Well keep reading…

    Contribute as a user

    Especially in the ruby community, it's quite common to utilize open source libraries for your day to day tasks (even if the actual work is proprietary). As a user, finding ways to enhance the tools you already use are excellent avenues for open source contribution.

    Here are some simple, quick, and easy ways to contribute:

  • File a bug report with steps to reproduce
  • Improve the documentation
  • Contribute example usage code snippets
  • Blog about your experience using it
  • Fix a bug, and submit your fix to the maintainers
  • At Intridea, we utilize this method often. For example, during a project utilizing Google spreadsheets, we found a bug in the roo gem roo gem that prevented it from reading cell comments. Thus, we researched the problem, fixed it, and submitted a pull request back to the maintainer. This format required no special open source time, as it was necessary for the project, and sharing our fix with the community took only a few minutes.

    Open source in small ways

    Another way to open source, without devoting your weekends and nights is by creating small projects. In the ruby community, this can mean creating a gem that solves a common problem.

    Recently at Intridea, we created a small open source project for the confluence-soap gem. During a project that required us to interact with wiki pages in Confluence, we discovered many of the ruby libraries were incomplete, out of date, or lacking documentation.

    Instead of waiting until our gem implements all API methods though, we took the opportunity and released it ourselves. You'll notice the Confluence SOAP API includes roughly 160 different methods, while our gem features only twelve. We only implemented the methods that were useful for us, and that’s okay! You don’t have to come up with a huge elaborate project to make it worthwhile for open source.

    What are you waiting for?

    Open source doesn’t have to be time consuming. Utilizing everyday tasks are simple ways to participate in the open source community. As a developer, you are in the best position to enhance, create, and improve the tools you already use! So, get strategic with your work, find those opportunities, and contribute!

    Got any tips or tricks for open source? Let us know!

    Want to see more? Check out Intridea's newest open source: Houston: Mission Control for Distributed Teams

    Categories
    Author

    It happens at every conference.

    Vendors and sponsors in their swag-filled booths—each barely distinguishable from the next—all vie to present themselves as the best hackers and builders, rambling on about their “insert latest tech trend solution here.”

    But not Mobomo.

    We proudly sponsored our first MoDevGov conference, and like any mobile development firm worth its Macs, we asked ourselves: “Why tell when you can show?”

    And thus, our MoDevGov hackathon was born.

    We decided to make our booth interactive by creating a real-time web application that users could interact with using any device. After some Mobomo mind-melding, we opted to bring a childhood classic back and top it with a Mobomo twist. Our Frogger allowed infinite frogs to test their fate in real time over websockets.

    tumblr_inline_n1pxjykFca1s3db6i

    Users with a computer could see the entire game and all frogs moving across the road. Mobile users were presented with an NES-style remote with to control their frog while watching it move on the projector.

    mobomo-ceo-founder

    When in doubt? Show—and play!

    Categories
    Tags
    Author

    tumblr_inline_n1puizQelv1s3db6i

    We are thrilled for the success of our client, SpreeCommerce, who has just landed a major client (and got major coverage in TechCrunch): GoDaddy! SpreeCommerce, an open source shopping solution, will support GoDaddy’s new e-commerce storefront, as they prepare to compete against Shopify.

    spreecommerce-example-page

    Maximizing the Ruby on Rails flexibility of Spree, GoDaddy has created a number of customizations to best serve its small business customers seeking online retail solutions. Customers at all technical levels will be able to successfully use the site, as GoDaddy paid particular attention to usability and simplicity—both facilitated by SpreeCommerce’s user-friendly offerings.

    spreecommerce-responsive-views

    Spree’s simplicity and ease of use coupled with its robustness made it the clear runner in a list of other e-commerce platforms. Sandeep Grover, Head of Product for Presence and Commerce at GoDaddy, notes:

    "There are a lot of e-commerce sites out there, including our own [QuickShoppingCart] that are extremely complicated. We felt that there’s no [other] solution that’s easy, affordable, or extensible."

    And GoDaddy isn’t the only one: SpreeCommerce underlies the shopping experience of Bonobos, Blue Bottle Coffee, Chipotle, Tommy John and numerous others.

    Congrats, SpreeCommerce: keep making shopping easy!

    Categories
    Tags
    Author
    Subscribe to General