Mobomo webinars-now on demand! | learn more.

angularjs lock

What is Async?

Async (aka asynchronous) JavaScript refers to the execution of more than one piece of code at the same time. This is great because it prevents your application from freezing up when certain code takes a long time to execute, but it can also cause issues in your code if you are expecting something to be complete when it may not be. These situations are called race conditions. Here is an example of when a function is performing asyc code and we don’t get the result we are expecting: http://codepen.io/dganoff/pen/oXLNeb. Notice the name variable isn’t returned as “Bob”, but is instead returned as it’s initial value.

Enter: Promises

Promises allow developers to detect when asynchronous code finishes and then act on it. Instead of a function returning a value we expect, we can have it return a Promise, and then let the Promise tell us when the value is ready to use. Now let’s take a look at how Promises can fix our issue in the original example: http://codepen.io/dganoff/pen/QbNxJq. Using the built-in promise library $q that ships with Angular, we can return a Promise instead of just the name variable. The Promise is “resolved” after the timeout finishes, which tells the promise to execute its then method to finally return the value we originally wanted.

Real-world GitHub API Example

One of the most common uses for Promises is within a Service that makes a HTTP call and returns the response to a controller. Since HTTP calls take some time to finish, they are a prime candidate for Promises. Here’s an example of how we can use a Promise to return the HTTP response to a controller when it’s ready: http://codepen.io/dganoff/pen/zGKpzv

Advanced Promises

Let’s say you need to make a number of consecutive HTTP calls within your Service before returning the result back to the controller. The $q library has a very useful method call $q.all. This allows you to pass an array of Promises to the method and it will only execute its ‘then’ method once all Promises have been resolved. This prevents any race conditions when executing multiple HTTP calls before performing another action.

Another case where we can use multiple Promises is a technique called ‘Chaining Promises’. Sometimes within a controller, we’ll need to call one HTTP Service before another HTTP Service can be called, in case we need information from the first Service. The nice thing about $q Promises is that the Promise itself returns a Promise. This way we can have a function return one of our Services that returns a Promise and then act on that once it’s ready. If we take our GitHub API example, I can chain the ‘getGithubUserInfo’ function with another function by returning a Promise. This is what that might look like: http://codepen.io/dganoff/pen/aOmEVZ

Conclusion

Promises are a powerful tool in software development. Any web developer should have at least a basic understanding of Promises, if not a thorough grasp of the concepts discussed in this article. Please feel free to fork and edit these codepen examples to test our your own skills with Promises so you can master this critical technique.

Categories
Author

Ionic
With the release of Ionic 1.0, we’ve reached a new level in building hybrid mobile applications via web technologies. While Ionic is probably more well known for its CSS components and JavaScript/AngularJS extensions, I’d like to highlight a few tools that have really improved my ability to develop applications rapidly, which are included with the Ionic CLI.

The first, and probably most time-saving tool in the Ionic CLI, is the ability to live reload your app as you make code changes. Prior to being able to live reload, if you wanted to preview/test changes in a simulator or on an actual device, you would have to “build” (or compile) your app’s package, and then “run” (or install on the device, and launch). Web developers familiar with using live reload in Chrome to debug web apps will be very familiar with the Ionic CLI live reload process. Each time you save an HTML, CSS, or JS file that’s being “watched” in your app, the app will refresh while running on your device, so you don’t have to build & run each time (which is a very slow process). You can also change the files being watched by editing the watchPatterns in your ionic.project file. Read more about the live reload tool on the Ionic blog, or in the CLI documentation.

One of the great features of developing hybrid apps is leveraging the same code base for building iOS and Android apps. Ionic’s CSS components and JS extensions appear differently on iOS and Android, as they’re geared to mimic each native platform closely. The Ionic Lab tool allows developers to launch a browser window displaying how the app would look and behave on both iOS and Android. Since its running in a browser, it’s not going to allow you to preview native-level functionality, like if the ngCordova $cordovaCamera service performs differently on each platform, but it is very handy for monitoring CSS changes, and whether a change you made breaks something on one platform, but not the other. It also comes with the aforementioned live reload tool built in, so you’ll see both the iOS and Android version of your app refreshing in real time. Read more about Ionic Lab on the Ionic blog, or in the CLI documentation.

The last tool I really appreciate is the ability to print your app’s console logs to the Terminal tab you’re running the app from. There was a time when, before Safari allowed debugging of an iPhone connected to a Mac, developers had to hack together a solution in order to gain visibility into the JS running in their hybrid app running on a device. This consisted of Xcode logs and a tool called WEINRE (“WEb INspector REmote”). It was not pretty. Suffice to say that the ability to access the console logs of your app running on a device by simply passing the “-c” flag when running the “ionic serve” command is nothing short of a godsend. Read more about the command line flags available with the Ionic CLI.

While using live reload, Ionic Lab, and a combination of console logs and other tools available with the Ionic CLI have vastly improved the speed with which I can build hybrid mobile apps, the Ionic CLI currently has many additional features. You can emulate or run your app on a simulator or actual device, automatically generate the icons and splash screens required for both iOS and Android, or share your app with others using Ionic View. There are also many more exciting things in the pipeline, like Ionic Deploy (update your app without having to resubmit to app stores), Ionic Analytics (track all activity in your app), and Ionic Creator (prototype Ionic apps using drag-and-drop components).

Its an exciting time to be a hybrid mobile app developer, and Ionic is leading the pack when it comes to modern hybrid frameworks. Start building your own apps today!

Categories
Author

Have you ever been working with a particularly complicated web application and found that the output you were getting back from $log was difficult to wade through? Perhaps it's a complex XML response (because you're working with a SOAP API), or it's a particularly dense JSON response. Maybe the browser you use as your primary workhorse is working fine, but you found a gnarly bug in handling the response you're getting back from an API and it's failing in one of the other browsers you’re testing?

I recently ran into an issue similar to this; for me, it was while working with a SOAP API. And while the browser I'm using has all of the necessary development tools, emitting the responses I was looking for in an easy-to-read way was just not happening for me. No matter how I went about logging it all out, the response was coming back as a single line of text when emitted to the JavaScript console, and because it was a string I was having trouble easily inspecting it. While I wasn't having browser-specific issues (in this case), needing to add the extra effort of moving over to a view in my debugger was costing me precious turn-around time in trying to debug this response. If I was having this sort of issue with these responses, then the other developers on my team likely were as well.

After doing some research, I came across a fairly light-weight library called vkbeautify, which handles beautifying (as well as minifying) strings that are passed in to the appropriate method. This solved part of my problem: I now had a way to programmatically re-format my XML strings. Now, I could have stopped with simply injecting the library into the application, then just emitting out the formatted strings while I was debugging the issue I was trying to resolve. However, as I mentioned earlier, I'm working as part of a larger team, and I wanted the rest of the team to have this ability as well. Furthermore, I wanted us to be able to selectively emit data into the console in a consistent manner with some sane defaults.

The next logical step was to look at the $log service. Since this is an abstraction of the global console interface (log, info, warn, debug, etc) and it had the benefit of being stubbed so it wouldn’t display in unit tests, it made sense that I should simply extend that service. That way, any developer could call a method of the $log service to emit these nicely formatted strings.

To accomplish this, I created a provider decorator for $log and made it available from within the application. One of the nice things about provider decorators is that you can leverage a reference parent service and then call that service’s methods, which was nice because I wanted to leverage the existing infrastructure as much as possible – truly extending the $log service. So, I added a new method (called pretty, a nod to the concept of "pretty printing," which is common in most programming languages), and had that piggy-back on one of the other methods in the service. It looks a bit like this:

angular.module("myApp").config(["$provide", function ($provide) {   $provide.decorator("$log", ["$delegate", function ($delegate) { // $delegate, here, is an internal       reference to $log     $delegate.pretty = function (input, opts) {       var output;       opts = opts || {};       output = vkbeautify[(opts.type || "json")]](input); // use the correct vkbeautify for beautifying the        string - vkbeautify.json, vkbeautify.xml, vkbeautify.sql, etc; defaults to json       $delegate[(opts.output || "log")].call(null, output); // leverage one of the other $log methods to    actually emit the output; defaults to log     };     return $delegate;   }]); }]); 

Now, in our application, when a developer makes a call to $log.pretty(), the input they pass to it is run through vkbeautify with the given data type and output method (defaulting to json and $log.log, respectively). These values can be changed by passing in an Object as the second parameter with a property of type or output set to the desired value. Here are a few examples:

$log.pretty("<div><h1>Hello world</h1></div>", {type: “xml”); // // <div> //   <h1>Hello world</h1> // </div>  $log.pretty("body:{background:#fff;}.rounded_box:{border-radius:20px;}", {type: "css"}); // // body: { //   background: #fff; // } // .rounded_box { //   border-radius: 20px; // }  $log.pretty({jsonObj: {childAry: [1,2,3], childObj: {someProp: "prop"}}}, {output: "info"}); // this would    emit using $log.info; leveraging that type is defaulted to json // // { //   jsonObj: { //     childAry: [ //       1, //       2, //       3, //     ], //     childObj: { //       someProp: "prop" //     } //   } // } 

While I lose the ability to log out multiple items with this method (console.log(var1, var2, var3), for example), I gain the far more important ability to emit nicely formatted output that is easier to scan and understand. The big take-away here is that you can leverage the ability to extend $log to create output necessary to make debugging your code simpler. Think of the existing API as a starting point, and go from there. Chances are good that most use cases are already covered, but there's always something that isn't.

Finally, to help anyone else that finds themselves in this specific situation, I’ve released this as a package that’s available on bower. Just run bower install ng-log-pretty and include both vkbeautify and the library itself in your application and you’ll be off and running. You can also check out the code on GitHub.

Categories
Author

mobomo management

We are excited to announce expansion and growth of Mobomo's executive team:

Ken Fang, formerly CEO, will now serve as President of the company. Since joining in 2010, Ken has led Mobomo from a small startup to a company with over $5M in annual revenue, a more than tripled staff, consecutively high rankings by Inc. 5000, over 120 product launches, and an increasingly glowing client roster. In Ken's new role, he will be focused on high-level company strategy, corporate partnerships, and sales.

Brian Lacey will be assuming Ken's responsibilities as CEO. Brian joined Mobomo in 2011 as a Project Manager, and because of his passion for UX design, was quickly promoted to Creative Director. Within a short period of time, Brian was soon appointed COO, and under his tenure, Mobomo successfully built out well-defined design, development, and quality assurance capabilities. He also spearheaded the founding of the Buenos Aires office and helped acquire Exceptual Technologies, among other operational expansions.

Jesse Vizcaino will be assuming Brian's responsibilities as COO. In 2012, Jesse launched his Mobomo career as a Project Manager and quickly rose to Director. In his various roles, he has been instrumental in guiding Mobomo’s strategic direction, streamlining operations, and signing flagship customers such as the District of Columbia Retirement Board and the National Library of Medicine.

Please join us in congratulating Ken, Brian, and Jesse: we’re excited to see the great things they’ll accomplish in their new roles, and wish them all the best.

Categories
Author

workfromhome
Sticking to a schedule, writing out your daily goals, and keeping yourself motivated are crucial to a healthy and effective remote position. Here are a few tips from a seasoned remote veteran:

1. Sticky Notes

Write down your tasks. The physical act of writing down, crossing out, and throwing away a sticky note is amazing! Scientifically speaking, this is more than just writing on a piece of paper. It’s a way to calm your mind, focus on the task at hand, and see through a project vs. aimlessly wandering through your day.

2. Breaks

Know that busy does not equate to productivity. If you’re feeling burned out at 10 am after an hour of research - TAKE A BREAK. Go for a walk, grab a coffee, or give someone a call. Step back from your computer and let your mind recharge. Some of the best musicians work in 90 min intervals and are consistent about 15-20 minute breaks.

3. Routine

Stick to a schedule. Wake up at the same time, exercise, eat breakfast, journal, and most importantly SHOWER. Just because you work from home doesn’t mean you should roll out of bed and go straight to working. Developing the habit of routine will help you work at optimal times and have a sense of accomplishment at the end of the day.

4. #standup updates

This is a strategy @Intridea uses for most projects and day to day operations. It’s a way of building accountability and awareness with our peers in regards to individual to-do lists. Working remotely can often feel like a silo and keeping everyone informed of your “work list” not only helps you to stay on task, but keeps others from derailing you with “emergency, last minute” requests.

5. Plan the Night Before

Create tomorrow’s to-do list the night before; it’s at the forefront of your mind and writing them down will keep you from dwelling on them throughout the night. Empty your brain and save valuable morning time by utilizing those last 15 minutes of your day to set tomorrow up for success.

6. Know When to Stop

Fight the urge to check work email after a certain time. Make it a point to shut down and be present with your family and friends. Traditional employees have the luxury of separating home life from work life, you however will need to be intentional with your personal time and designated “work” hours.

7. Social Media fasting

Block out times in the day for social media and honor your schedule. Facebook and Twitter can easily destroy productivity and suck hours away from your day! Know yourself and know when you work best - avoid these distractors and use them as rewards for getting stuff done vs. wasting your valuable time and energy on it.

Got any remote working hacks? Share them with us on Twitter!

Categories
Author

shink
If you’re reasonably up-to-date with front-end app development then there’s a good chance you’ve heard the buzz flying around about ECMAScript 6. For those unfamiliar, ECMAScript 6, also known as Harmony, is the next major version of JavaScript programming language. In this post, I’ll utilize new ECMAScript 6 features to reduce and improve readability of code in a sample AngularJS application.

Our sample application is a simple baseball card auction app that serves as a platform for users to sell rather valuable baseball cards and consists of three Controllers (BaseballCardsCtrl, BaseModalCtrl, and ConfirmModalCtrl) and three Services (UserService, CardService, and NotificationService).

Block-scoped bindings and arrow functions

The very first thing our application needs to do is fetch the current user’s profile, so we’ll start by taking a look at the getUserInfo function of our UserService which is responsible for retrieving the user’s information.

function getUserInfo() {     if (user) {         return $q.when(user);     } else {         let handleSuccess = (response) => {             user = response.data;              return user;         };          let handleError = (error) => {             NotificationService.logError('Unable to retrieve user info', error);              return null;         };          return $http.get('/dist/data/get_user_info_response.json').then(handleSuccess, handleError);     } } 

This function uses two of the new features of ECMAScript 6, namely block-scoped bindings, and arrow, or lambda functions. The handleSuccess and handleError functions above are declared using the let keyword, which restricts them to only being accessible by code in the same block; in this case, the else block of our if-else statement. This increases the overall readability of our code by moving variable or function declarations and assignments into the block where they’re intended to be used. Both handlers make use of arrow functions which provide a shorthand, expressive syntax for defining functions. In addition to providing a more compact syntax for defining functions, arrow functions also lexically bind the “this” keyword value, eliminating the need to manually bind object context when registering event handlers and such.

Generators and paused execution

Next, let’s take a look at an excerpt from our BaseballCardsCtrl that uses the UserService’s getUserInfo and CardService’s getCards methods to retrieve and store a reference to the user’s profile and baseball card data.

var it;  initialize();  function initialize() {     vm.notifications = NotificationService.getNotifications();      it = fetchData();      it.next(); }  function *fetchData() {     vm.user = yield getUserInfo();      vm.cards = yield getCards(vm.user); }  function getUserInfo() {     UserService.getUserInfo().then((user) => { it.next(user); }); }  function getCards(user) {     CardService.getCards(user).then((cards) => { it.next(cards); }); } 

The most interesting thing to note about the above code is the *fetchData function declaration. The function name is prefixed with an asterisk which is a new, special naming convention that results in the function returning a Generator object, another new feature of ECMAScript 6.

Generators are special Iterators that can pause their execution when the yield keyword is encountered. The ability to pause function execution allows us to control the order of asynchronous operations without need to use a series of nested callbacks. In our initialize function above, we store a reference to the Generator object on which we immediately invoke it’s next method to instruct *fetchData to begin executing its function body. The *fetchData function calls getUserInfo then pauses due to the presence of the yield keyword. The getUserInfo function is responsible for registering a callback function to be executed once the user’s information is retrieved from the server. Once the user’s information is retrieved, the callback invokes the Generator’s next function with the user data, which is returned by the first yield statement in *fetchData. The *fetchData function then releases the pause allowing execution to continue and the getCards function to be invoked with the necessary user data.

Object destructuring and string templates

Now that our application has been wired up to retrieve the necessary user and baseball card data, it needs a way to allow our user to actually sell his cards. The following snippet is from our CardService.

function sellCard(card, index) {     return $http.get('/dist/data/sell_card_response.json').then(handleSuccess, handleError);      function handleError(error) {         NotificationService.logError('Unable to sell card', error);          return null;     }      function handleSuccess() {         var { year, firstName, lastName, value } = card,             dollars = $filter('currency')(value);          cards.splice(index, 1);          UserService.updateBalance(value);          NotificationService.logSuccess(`Sold ${year} ${firstName} ${lastName} for ${dollars}`);          return card;     } } 

The majority of this code looks similar to what you’ve seen in other AngularJS applications with one exception, the first line within the nested handleSuccess method. This particular line uses what’s called Object Destructuring, another one of our new ECMAScript 6 features. Object Destructuring provides a shorthand syntax for declaring one or more variables with their values being initialized as property values of a target object. This is only a very basic example of how one might use Object Destructuring to consolidate multiple variable declarations into a single statement; it does support more complex mappings to nested object properties as well.

Another difference you may have noticed is our use of a string template to build a success message to be used as a “successful sale” notification. Traditionally, this would have been accomplished by concatenating multiple string literals with variables, but now we can achieve the same result using much more concise, readable syntax using variable interpolation with template strings.

Classes and prototypal inheritance

One requirement of our application is to prompt our users to confirm that they would like to proceed, after clicking a button to sell a particular baseball card. For this demo we use the UI-Bootstrap modal for our confirmation prompt. In real world applications there is often the need to utilize many different modals that implement a common subset of functions to handle repetitive tasks such as closing the modal when the user clicks a Cancel button. Implementing these functions for each modal leads to redundant code. Fortunately, ECMAScript 6 introduces a new way to approach prototypal inheritance in JavaScript using a more concise, readable syntax.

function BaseModalCtrl($modalInstance) {     'use strict';      var vm = this;      vm.dismiss = $modalInstance.dismiss;     vm.close = $modalInstance.close; } 

First we define an ordinary constructor function that creates dismiss and close members that reference the $modalInstance service’s dismiss and close methods. Admittedly, there’s nothing new or interesting to see here but in our next code excerpt, we will see how we can easily extend this functionality when we create our ConfirmModalCtrl.

class ConfirmModalCtrl extends BaseModalCtrl {     constructor(data, $modalInstance) {         super($modalInstance);          this.data = data;     } } 

While this feature isn't a new concept in JavaScript language, it does provide syntactic sugar, and achieve prototypal inheritance using a more concise, intuitive syntax. ECMAScript 6 classes and inheritance offer a standardized way to define JavaScript class constructors, public and private members, and make superclass methods calls. Of course, this is all possible today using native ECMAScript 5 code, but the syntax is not as elegant or intuitive. We now have an easy, readable way to extend functionality and eliminate code redundancy in our JavaScript classes.

Structure through modules

Lastly, let’s learn how to import various application components and register them with AngularJS. Historically, JavaScript has lacked a native way to structure applications and manage component dependencies. However while AngularJS does have its own dependency injection mechanism, it does not support importing external dependencies and requires components be available from within the current scope before registering with Angular.

ECMAScript aims to provide a native, standardized way to handle importing external dependencies with the introduction of modules. Lets take a look at how we can utilize the new module syntax to import external file dependencies and register our different components with Angular.

 import BaseballCardsCtrl from './controllers/baseball_cards.ctrl.js';      import ConfirmModalCtrl from './controllers/confirm_modal.ctrl.js';      import UserService from './services/user.service.js';      import CardService from './services/card.service.js';      import NotificationService from './services/notification.service.js';   angular.module('demo', ['ui.bootstrap'])   .controller('ConfirmModalCtrl', ConfirmModalCtrl)   .controller('BaseballCardsCtrl', BaseballCardsCtrl)   .service('UserService', UserService)   .service('CardService', CardService)   .service('NotificationService', NotificationService); 

As you can see in our above example, ECMAScript 6 modules introduce the new import keyword, allowing you to reference application components defined in external files. Here, we import each of our AngularJS application components (BaseballCardsCtrl, ConfirmModalCtrl, UserService, CardService, and NotificationService) and register them with our demo application. Each of our components uses an export statement, another new keyword in ECMAScript 6, to selectively make internal components available for import and use in other files..

 export default NotificationService;    function NotificationService($log, $timeout) {   ...   } 

The import and export statements support different syntax giving you flexibility over how components are referenced throughout your application. Note: We’ve only used the most basic, as it fulfills our application’s current needs.

Conclusion

ECMAScript 6 is still in draft mode and its specification isn’t expected to be officially published until later this year. For this reason, modern browsers currently have varying or incomplete support for many of the new language features. Fortunately though, there are quite a few tools to integrate support for ECMAScript 6 into your workflows and translate the code to ECMAScript 5 compatible syntax. As the release of the new ECMAScript 6 specification approaches, its new features are being integrated into more and more applications.

JavaScript is one of the most popular and widely used programming languages today; it’s not going anywhere any time soon and as it continues to evolve, so should our applications to harness it’s full potential and expressiveness. Our sample application uses one subset of the new features available in ECMAScript 6; there’s a lot more to it than what we’ve seen in this short example. For more complete information on ECMAScript 6 and how to integrate support for it in your workflow, check out the following resources.

Application


Resources


Categories
Author

working from home
Working remote is great; autonomy, flexibility, work/life balance, you name it! However, while the benefits severely outweigh the costs, working from home does present its own set of challenges. Below are the findings of a veteran to remote working.

1. You get to work from home, but you shouldn’t always.

Working remote is the freedom to work from anywhere. Often times we get fixated on remote equaling home office, but it so much more than that! Perhaps you enjoy working out in the sun, or maybe a little structure at a co-working space is your thing? Whatever it is - the point is you get to choose and that’s a beautiful thing.

Some of my best connections, ideas, and productivity have occurred outside the home office, so just because you can work from your kitchen, doesn’t mean you always should.

2. Autonomy is amazing, but also requires intentional discipline.

When describing my job, I often equate it to being your own boss w/o the usual entrepreneurial stressors. However, while there’s tons of freedom, with that freedom comes great responsibility (Spiderman plug). Sticking to a schedule, writing out your daily goals, and keeping yourself motivated are crucial to a healthy and effective work life. If you’re someone who thrives under constant supervision, be wary of remote jobs, this may not be for you. Self motivation and discipline are key to success in this arena.

3. Effective communication is a requirement, not a nice to have.

With the subtraction of body language, tone of voice, and physical proximity, the written word, emoticons, and timely responses become crucial. This is why utilizing GIFs, emoticons, and #status updates are important. If you think you’re being redundant, you’re probably doing just the right amount. Never underestimate the importance of emotional intelligence in the virtual world.
Think you can hack it? Intridea is hiring! :) Learn more about our AngularJS Engineer position.

Categories
Author

As a UX designer, improving the end user experience is my passion. When an interface or interaction seems confusing, I often find myself asking “What would I tell the user if I was there?” And immediately picture myself as a bystander, brainstorming every possible solution.

When you eat and breath this on a daily basis, it can quickly spill into the analog world. Suddenly, you have a heightened awareness of places and things where designers have built with the user in mind. And it’s in those instances, you can almost sense the designer looking over your shoulder, giving you a helping hand.

My first observation of this was the gas pump. We’ve all experienced “gas cap confusion” or the internal debate as to which side that dang cap is on! No matter how long you’ve been driving your car, this situation occurs more often than we’d like to admit. If you know where to look though, there’s a bit of user experience design making life a little easier. For years auto manufacturers have included a tiny arrow next to the gas pump icon indicating which side it's on.

GasPump

It’s such a simple touch. Just a tiny little arrow. But if you know about it, it can save you a world of frustration when heading to the pump.

Which got me thinking, are there other ways to simplify daily life via user experience design? And so began my pursuit and practice of Guerilla UX.

When we moved into our house, a point of frequent confusion was our garage doors, or more specifically the control panels that opened them. There’s a garage door on the left and another on the right, but with the panels stacked vertically (poor user interface design) it was impossible to remember! With a bit of Guerilla UX though, determining which pad opened which door was quickly resolved. Arrows now clearly indicate the side the control panels open.

GarageDoor

Another place with some added UX love is my printer. It’s a common hurdle; which side of the paper will the printer print on? And it’s of special concern when printing on special paper or making labels! Pre-UX, I’d always make a mark at the bottom of a plain sheet of paper and print a test page to avoid wasted time and paper. My Guerilla solution? A simple label with an arrow showing which direction to load the paper and a smiley face to indicate the top as well as what side it will print on. Tada!

Printer

These are just a few places I’ve added Guerilla UX to my daily life, but I have a feeling other designers (and non-designers) may use a bit of Guerilla UX to make their lives easier too.

Got some good examples? Tweet them to us with the hashtag #GuerillaUX and we’ll share the best ones!

Categories
Author

tidal
With "The ruler’s back” kicking off one of Jay-Z's greatest albums to date and the recent (re)launch of his streaming service Tidal, my hopes of a Jay-Z disruption were extremely high.

With claims to revolutionize streaming and pay artists what they deserve, Tidal depicted the utopian ideal of edgy design, quality, and fairness. I was pumped to check it out, not merely as an H.O.V. fan, but as a UX/UI junkie craving to experience music streaming in a new way. With creds for shaping one of the most popular music genres, you'd think Tidal would bleed the Jay-Z innovation as well. Yet, what I discovered was anything but revolutionary.


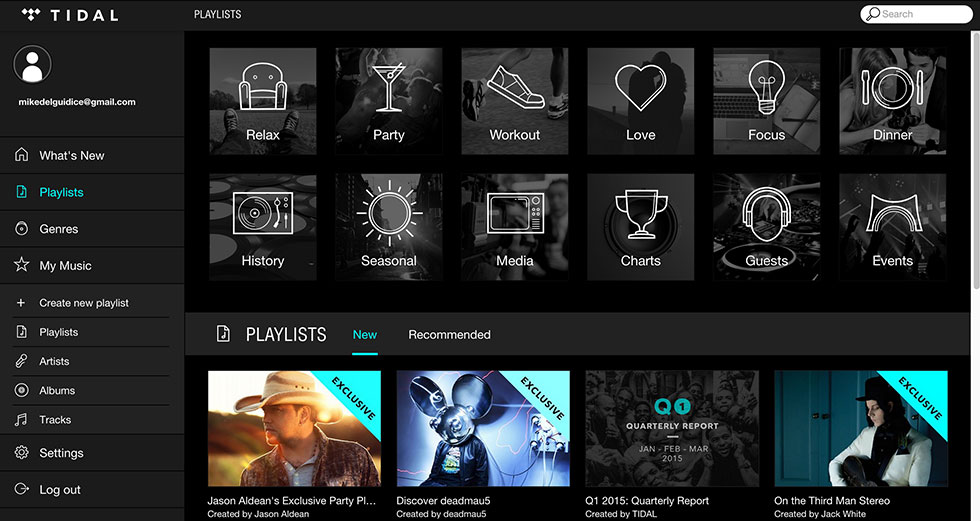
The interface is the same grid layout we’ve all come to know (and love) from our other player, cough Spotify. Not that there is a problem with the way big “S” handles their layout, in my opinion, it does some pretty amazing things, especially in regards with how it handles an incredible library of content.

Tidal
I just expected more with Tidal, especially coming from J-HOVA, someone who’s built his career by straying from the beaten path. I wanted something that would blow my mind, something that made me NEED Tidal, but it just wasn’t there.

There were glimpses of what Tidal could have been, with slick transitions that make sense to a user and don’t remove them from the moment.


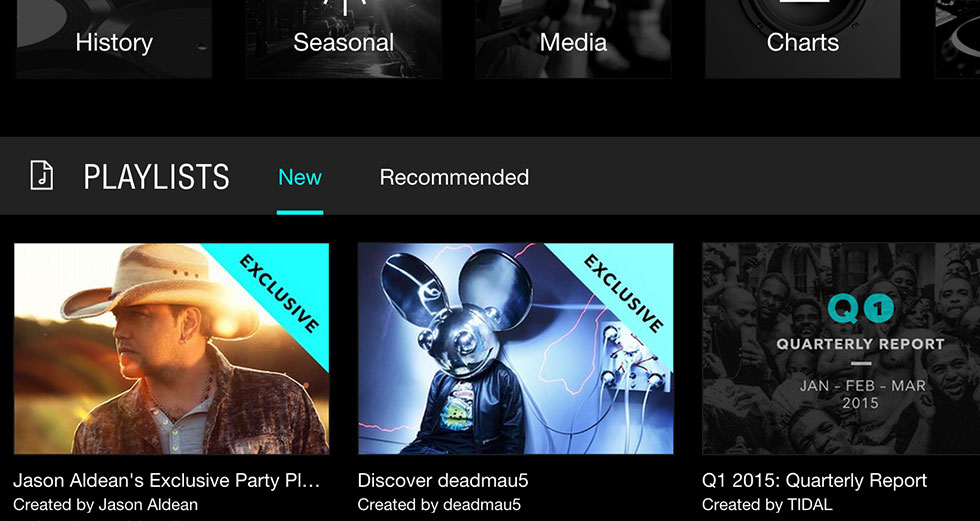
There were literally two instances when this level of detail was applied. And the look of the app is super sharp, black on black with pops of neon blue that scream for you to click.

Tidal2
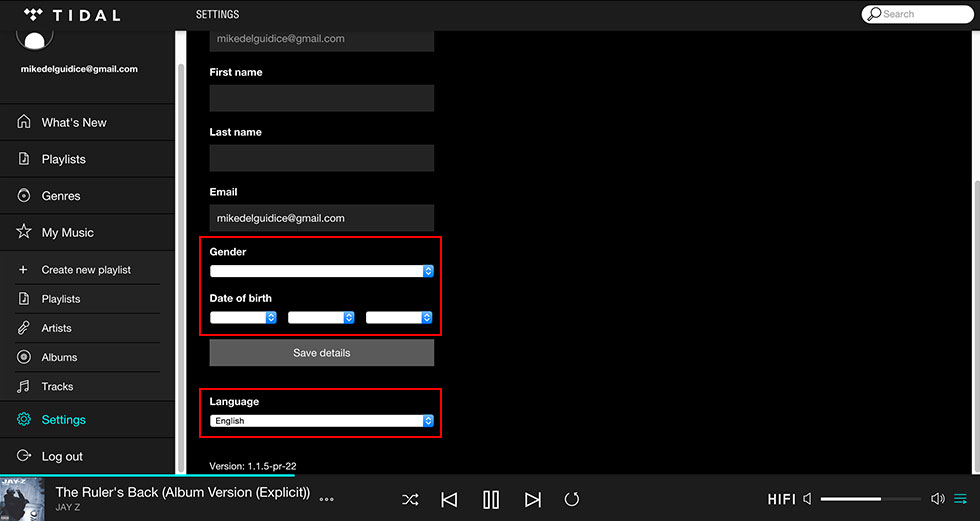
Also, there’s no denying that Tidal has a very trendy look, but it’s the details that make a truly immersive and engaging experience. Unfortunately, with Tidal's design inconsistencies and jarring page transitions, it was difficult to convince myself I needed this new platform for music streaming. And with a price tag of $19.99 for premium membership, Tidal, missed the boat (pun intended) on this user.

Tidal 3
Let me clarify though, this is in no way a put down to the team of incredible designers who obviously spent countless nights away from their families. This is merely my take on a, now, very traditional service from someone who has made a name for themselves by rising above, not floating amongst his peers.

What are your thoughts? Would you make the switch from Spotify to Tidal? Let us know.

Categories
Tags
Author

AngularJS editor

When it comes to learning your editor, most of us avoid it like the plague. It’s time consuming, opinions run rampant, and quite frankly, we’ve got better things to do!

Yet this avoidance isn't effective (and we know it). Simple tasks such as performing “find and replace” become much more difficult when we don't understand how our editor operates...

So why do we still refuse to eat our vegetables? For a few reasons:

It’s overwhelming.

Reviewing an editor, like emacs (or vim, or sublime text) is overwhelming. Not only can the editor accomplish many tasks, but there are multiple ways of doing them! For instance, when performing a “find and replace” on a file in emacs, you can use a regular expression (now you have two problems) or a keyboard macro. All these options can quickly lead you down a rabbit hole and wondering (three hours later) “what did I just do with my time?!”

Getting sidetracked by editor holy wars

When asking a co-worker for advice, if that co-worker doesn't use your editor of choice the discussion can devolve into: "Emacs is awful. You should use Vim and do it this way." Then instead of learning your editor, the conversation continues into the merits of one editor versus another, when both could do the job adequately. Avoid this at all costs.

Deadlines

We have work to do. When working on a bugfix or a feature with a tight deadline, you can't afford to spend time learning your editor. But then, not learning your editor makes your text editing less efficient, which makes development work take longer than it should. Soooo...

A Better Approach

Despite all these variables though, learning your editor is worth it. You just have to get strategic. Here’s my suggestion: while doing your everyday work, keep a notepad with an ongoing “need to learn” list for your editor. Then, when you find yourself wanting to perform a particular task (search across project files) and don't know how to do it, you can come back to it later vs. stopping everything to figure it out right then and there.

Then once a week, for thirty minutes, take one item on your list and look up how do it. For the coming week, keep in your mind (or a post-it note on your monitor) how to perform this task in your editor, and use it when necessary. This will help you remember the task and how to do it. Next week, you can cross off another item on your list.

This approach requires a small time commitment each week and avoids going down the rabbit hole of configuring your editor during your normal work day.

Categories
Author
Subscribe to