
Mobomo webinars-now on demand! | learn more.

Alright, so your big data infrastructure is up and running. You've collected and analyzed gigabytes, terabytes, maybe even petabytes of data and now you'd like to visualize your data on desktop PCs, tablets, and smart phones.

How do you go about doing this? Well, let me show you. Visualizing big data, in many cases, isn't far from visualizing small data. At a high level, big data when summarized/aggregated, simply becomes smaller data.

In this post, we'll focus on transforming big data into smaller data for reporting and visualization by discussing the ideal architecture, as well as present a case study.

Architecture: Frontend (data visualization)

On the front end, we utilize responsive design with a single code base to support desktop, tablet, and mobile phones. For native mobile apps, we can utilize tools like PhoneGap or Adobe Cordova for responsive design; a process that significantly cuts down cost, shortens time to market, and is a great option for business apps.

Here are two popular frontend approaches:

1. Server Side MVC:

Server side MVC (model view controller) has been the de facto standard for web app development for quite some time. It's mature, has a well established tool set (i.e Ruby on Rails), and is search engine friendly. The only downsides are it's less interactive and less responsive.

2. Client Side MVC:

Capitalizing on JavaScript for page rendering, apps developed on Client Side MVC are more responsive and interactive than server versions. At Intridea, we've found this method to be particularly suited for interactive data. In addition, referred to as single page applications, Client Side MVC, have the look and feel of a desktop app. Therefore, creating an ideal user experience that is highly responsive and requires minimal page refreshing.

Architecture: Backend (data storage and processing)

Typically 'big data' is collected through some kind of streaming APIs and stored in HDFS, HBase, Cassandra, or S3. Hive, Impala, and CQL can be used to query directly against the data. It's fairly convenient to query big data this way, however not efficient if data has to be queried frequently for reporting purposes.

In these situations, extracting aggregated data into smaller data may be the better solution. MongoDB, Riak, Postgres, and MySQL are good options for storing smaller data. Big data can be transformed into smaller data, using ETL (Extract, Transform, Load) tools, thus making it more manageable (e.g. realtime data can be aggregated to hourly, daily, or monthly summary data).

Note: For single page application, a restful API server is needed to access the aggregated data. Our favorite API Server is Ruby on Rails.

Case Study: American Bible Society

American Bible Society provides online access to 582 versions of the Bible in 466 languages through partnerships with publishers. With their javascript API generating billions of records every year, ABS needed help making sense of their data. Thus, we partnered with ABS to create ScriptureAnalytics, a site that gives insights into their vast collection of data.

Access to the Bible translations was provided via JavaScript APIs. The usage of the APIs was tracked at the verse level, along with ip location, timestamp, and duration. The raw usage data was collected through AWS Cloudfront (Apache log files) and stored on EC2 S3 and preprocessing/aggregation of stats was conducted via AWS Elastic Map/Reduce with Apache Pig and Hive.

ABS receives over 500 million tracking log entries from Cloudfront every year, including several bible verse views per entry. What's this amount to annually? About several billion views each year!

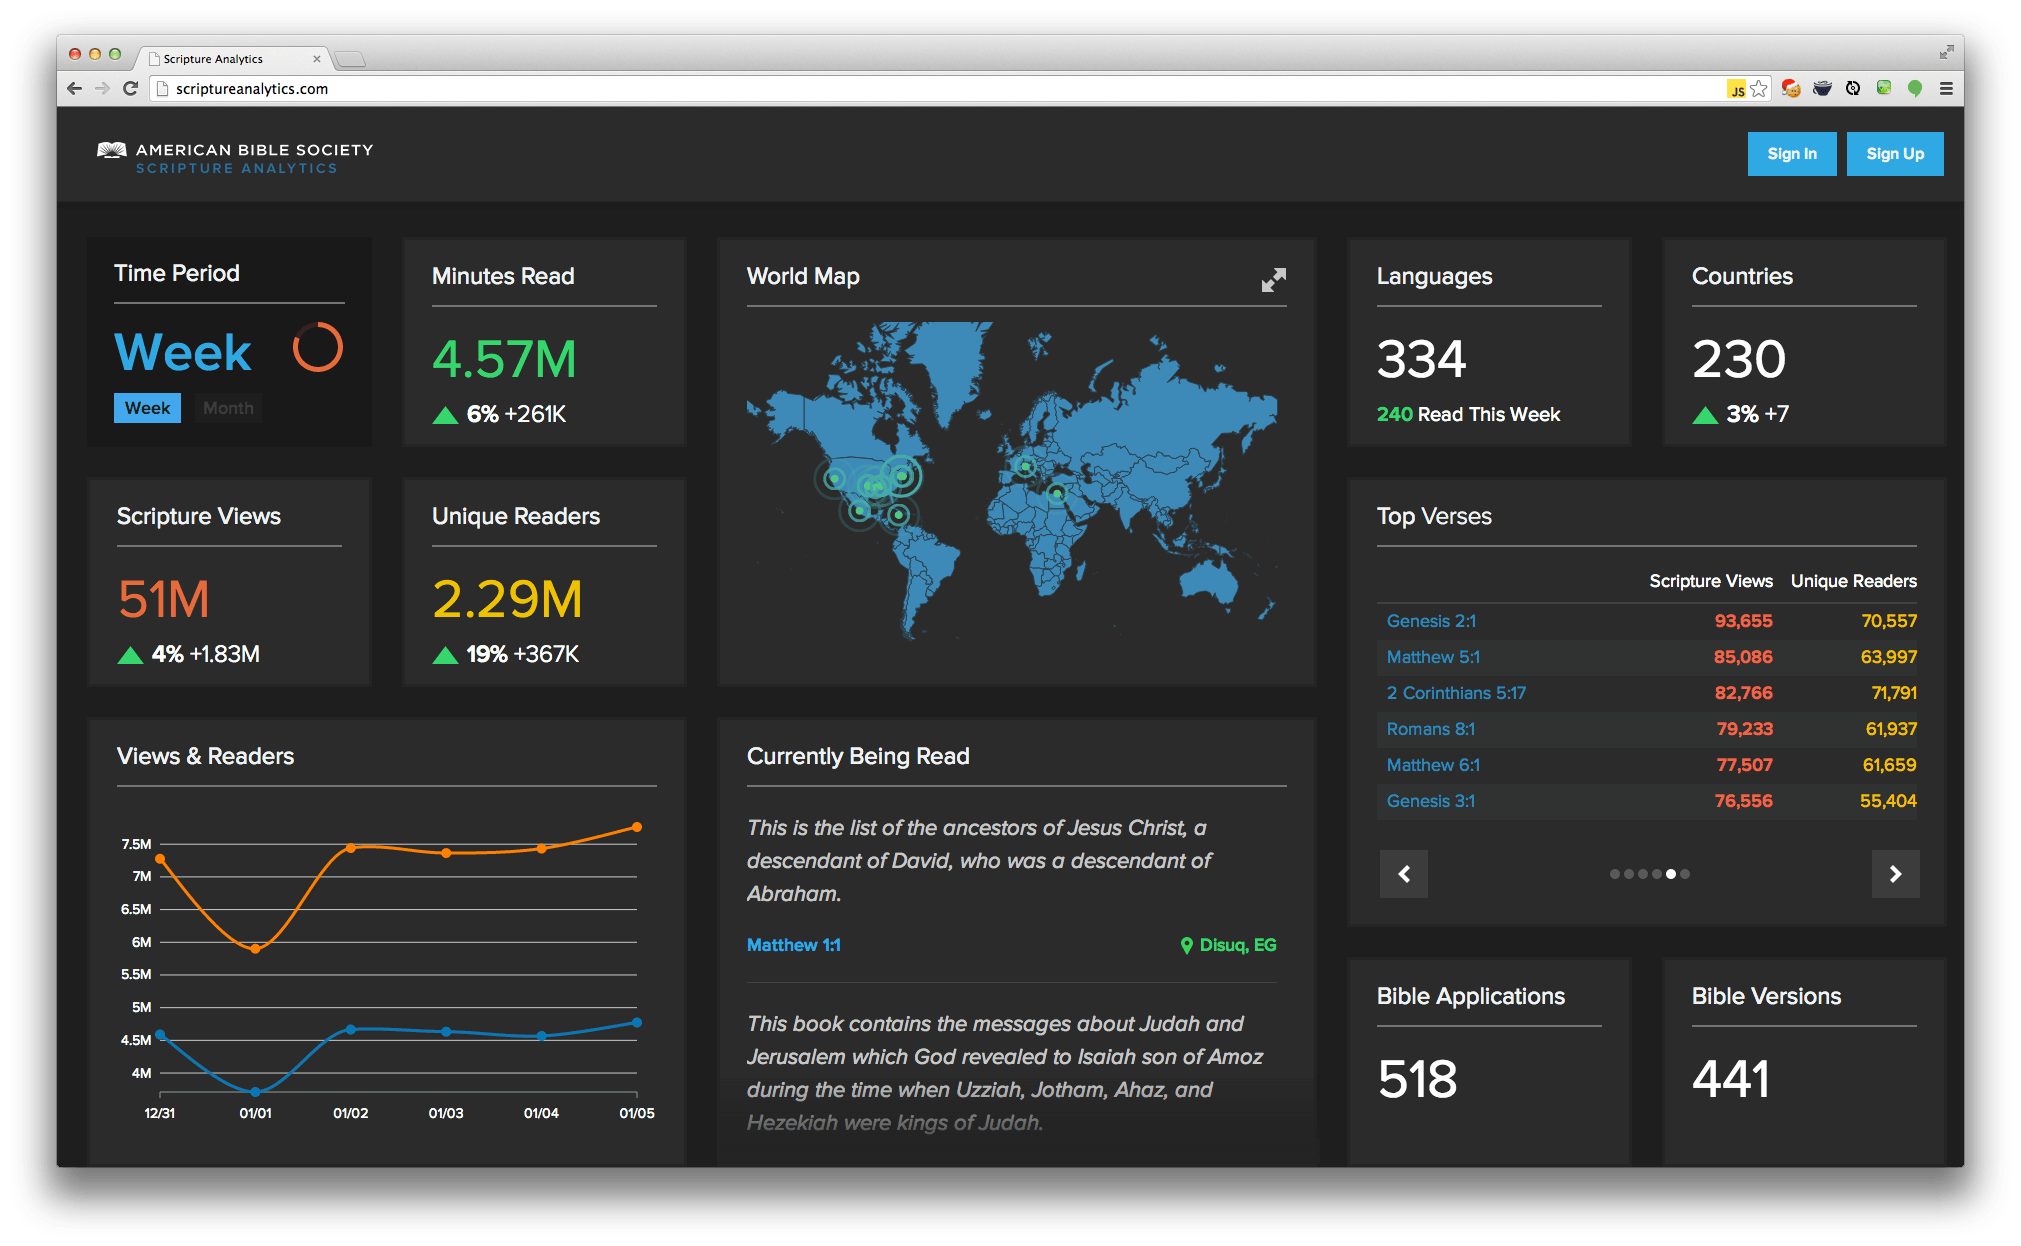
Intridea was asked to develop public and private dashboards for visualizing Bible readership stats in an interactive and responsive way. The public dashboard, scriptureanalytics.com, was developed for the general public to view summary level status and trends. While the private dashboard was for ABS and publishers to track individual translations, helping them be strategic on a multitude of levels.

The dashboards were developed as a responsive single page app with Rails/MongoDB as the backend, and Backbone.js, D3, Mapbox as the frontend. The app pulls aggregated hourly/daily stats (generated using Hive and Pig running on Elastic Map/Reduce Hadoop clusters against the raw data stored in S3) in the JSON format from S3 and stores them in MongoDB for fast query access. The dashboards pull data from MongoDB via Rails and use Backbone/D3/Mapbox to visualize the stats. We use MongoDB's aggregation framework to query the data stored in MongoDB.

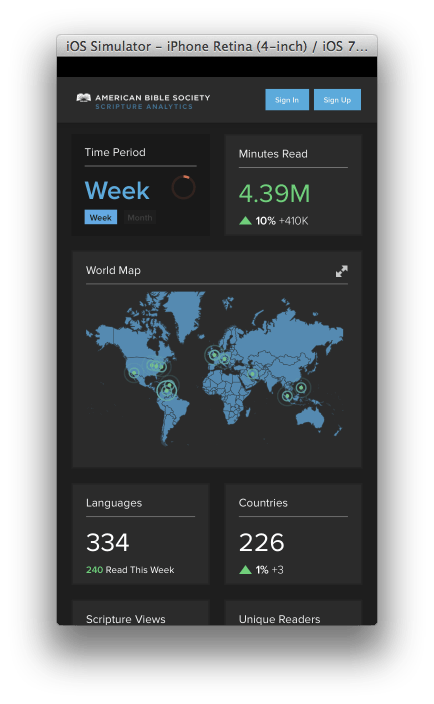
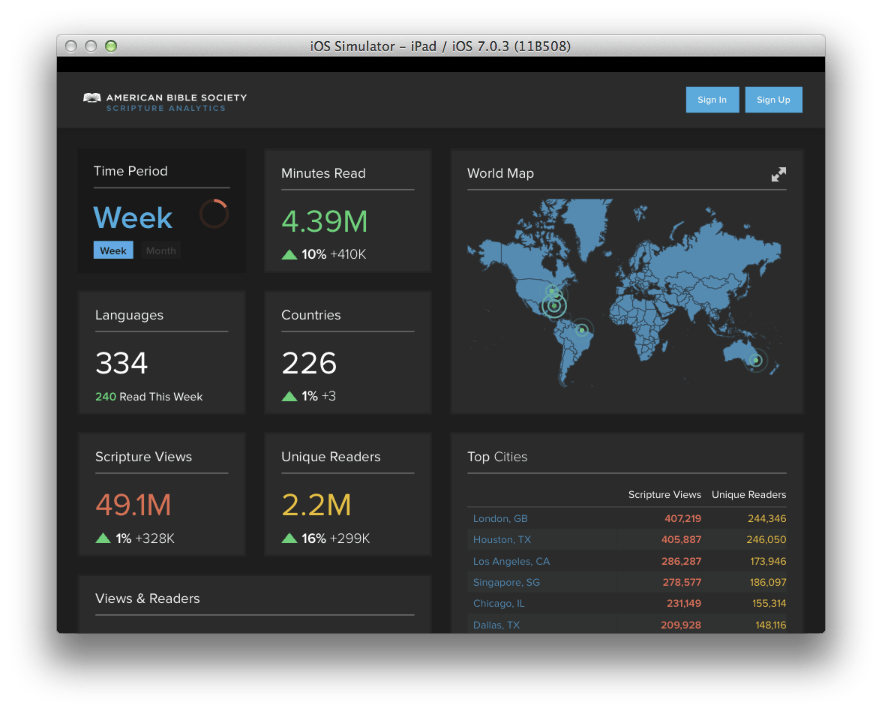
See screen shots below for iOS, iPad, and desktop PC:

Smart Phone

smart phone

Tablet

tablet

Desktop

desktop

Got any questions about visualizing big data on a small screen? Let us know!

Want to learn more? Check out the entire Big Data series below!

  • Big Data, Small Budget
  • Single Page Apps: Popular Client Side MVC Frameworks


Categories
Author

In the last Built For Speed post, I demonstrated how you can use the Amazon CloudFront Content Delivery Network (CDN) for images on your site. However, ideally we should be using CloudFront for all static assets, not just images.

Before we jump into that, though, let’s do a quick review of how CloudFront works. Like all CDNs, CloudFront consists of a number of edge servers all around the world, each of which has a connection back to a central asset server. When CloudFront receives a request for an asset, it calculates which edge server is geographically closest to the request location. For example, a user in England may request the asset ‘dog.jpg’. CloudFront will route that request to the London server, which will check if it has a cached version of ‘dog.jpg’. If it does, the edge server will return that cached version. If not, it will retrieve the image from the central asset, cache it locally and return it to the user. All subsequent requests in England for ‘dog.jpg’ will get the cached version on the London edge server. This approach minimizes network latency.

There is one big gotcha with this approach: If the ‘dog.jpg’ image changes from a poodle to a beagle, but keeps the same name, the edge server will keep serving the poodle image (assuming the expires headers are set far in the future as they should be). The edge server will not pick up the latest asset unless the name of the asset changes.

Okay, with that background out of the way, let’s take a look at how we can get our CSS and JavaScripts served through CloudFront. The approach I’ve taken is to create an initializer file that sets a REVISION constant. This could easily be created as part of a deployment process, copying the latest Git or Subversion revision into the initializer file, but for now I just created it manually. We’ll append the REVISION constant to the names of your packaged CSS and JavaScripts, so that on each deploy, the files have a different name, thereby preventing CloudFront from serving stale assets.

I have also moved the S3 configuration parsing out of the Post model and into another initializer, which sets the S3_CONFIG hash constant. In addition, I added the bucket name to my amazon_s3.yml config file. (Remember, if you have any questions, you can always refer to the source code.)

 # /config/initializers/s3_config.rb S3_CONFIG = YAML.load_file("#{RAILS_ROOT}/config/amazon_s3.yml")[RAILS_ENV] 

See below for the Rake task I wrote to copy the packaged files to S3. Note that this should be run after you run the ‘rake assets:packager:build_all’ task from AssetPackager (see the first Built For Speed post).

 require 'right_aws'  namespace :s3 do   namespace :assets do     desc "Upload static assets to S3"     task :upload => :environment do       s3 = RightAws::S3.new(         S3_CONFIG['access_key_id'],          S3_CONFIG['secret_access_key']       )       bucket = s3.bucket(S3_CONFIG['bucket'], true, 'public-read')        files = Dir.glob(File.join(RAILS_ROOT, "public/**/*_packaged.{css,js}"))        files.each do |file|         filekey = file.gsub(/.*public//, "").gsub(/_packaged/, "_packaged_#{REVISION}")         key = bucket.key(filekey)         begin           File.open(file) do |f|             key.data = f             key.put(nil, 'public-read', {'Expires' => 1.year.from_now})           end         rescue RightAws::AwsError => e           puts "Couldn't save #{key}"           puts e.message           puts e.backtrace.join("n")         end       end     end   end end 

Again, ideally this should be part of the deployment process – first, run the AssetPackager task to create the packaged asssets, then run the S3 upload task to store them on S3. Notice that I’m appending the REVISION string to the end of file names for each of the packaged CSS and JavaScript files before uploading to S3. Also notice that I’m setting the Expires header to one year from now.

Hmm, we may have a couple problems here. First, by default, Rails expects CSS and JavaScript files to be in their proper places in the /public directory at the root of the application. That’s easily fixed by adding the following line to the bottom of /config/environments/production.rb:

 ActionController::Base.asset_host = Proc.new { CLOUDFRONT_DISTRIBUTION } 

The second problem is that the helpers provided by the AssetPackager plugin (‘stylesheet_link_merged’ and ‘javascript_include_merged’) don’t know that you’ve added a revision number to the end of the filenames. Not to worry – we just need to update a couple lines in /vendor/plugins/asset_packager/lib/synthesis/asset_package.rb. Update the ‘current_file’ method to look like this:

 def current_file   build unless package_exists?    path = @target_dir.gsub(/^(.+)$/, '1/')   name = "#{path}#{@target}_packaged"   name += "_#{REVISION}" if defined? REVISION end 

Try making those updates, then running ‘rake s3:assets:upload RAILS_ENV=production" (remember we’re running in production mode for all the Built For Speed examples). After restarting your application, inspect the source and you should see that your stylesheets and scripts are being served by CloudFront, with the revision number at the end of the file names.

Now let’s return to our images. After the last post, we already have them delivered by CloudFront. The problem is, if you decide to update your image, Paperclip will give it the same style names as before (‘original’, ‘large’, ‘medium’, ‘thumb’). Uh-oh. Because the files have the same names, the CloudFront edge servers won’t update from the central asset server to use the latest image, and your users will continue to see the stale, old image.

Go ahead and give it a try by updating an image for an existing post. Whoops! The old image is still displayed.

Here’s how we solve that problem. First of all, let’s update the Post model to use the new S3_CONFIG constant. While we’re at it, let’s add a timestamp to our image path so that each time you update the image, it will have a different name.

 # in /app/models/post.rb has_attached_file :image,                  :styles => {:large => "500x500", :medium => "250x250", :thumb => "100x100"},                  :storage => 's3',                  :s3_credentials => S3_CONFIG,                  :bucket => S3_CONFIG['bucket'],                  :path => ":class/:id/:style_:timestamp.:extension" 

One small issue: For some reason the Paperclip plugin uses a string representation for its ‘timestamp’ method, so you end up with values like “2009-06-26 15:25:44 UTC”. This isn’t very practical for timestamping file names, so I’ve changed it:

 # /vendor/plugins/paperclip/lib/paperclip/interpolations.rb def timestamp attachment, style   attachment.instance_read(:updated_at).to_i end 

With that change, now each time we store an attached image, it will have a timestamp affixed to the end of the filename. Thus, the CloudFront edge server will go back to the central asset server and retrieve the new image rather than serving up the old image. Don’t worry – for each subsequent request, you’ll get the benefit of having the new image on the edge server.

Restart your application, and try updating an image again. This time around, you’ll see the image is updated correctly.

That wraps it up for our CloudFront review. Now go forth and speed up your sites!

Update

I realized I promised in my last post to show you how to make YSlow recognize that you were now using a CDN. Here’s what you do:

  1. Go to “about:config” in Firefox
  2. Right-click on the page, and select “New” > “String”
  3. Enter “extensions.yslow.cdnHostnames” as the preference name
  4. Enter “cloudfront.net” as your CDN host name
  5. Restart Firefox and run YSlow on your application again – you should now see that you get an “A” for using a CDN

RESOURCES

Built For Speed source code

Categories
Author

This is the second in a series of posts on improving your site’s performance with the help of the YSlow Firefox plugin. In the last Built for Speed post, we took a look at YSlow’s most important factor in page speed – the number of HTTP requests. We demonstrated using the AssetPackager plugin to help reduce both the number of HTTP requests and the size of your CSS and JavaScript files. The source for the Built for Speed application is available on Github.

This week, we’ll learn how to use a Content Delivery Network (CDN) to help users see our static content faster. Granted, this may be overkill for a lot of sites, but I think it’s worth the time to see how it’s done. There are a lot of CDNs out there, but I’ve decided to use Amazon’s CloudFront because it’s relatively cheap and easy to set up (not to mention it integrates seamlessly with S3). Before you get much further, you’ll want to set up an account with S3 and CloudFront.

First, let’s install the Paperclip plugin so we can upload an image to go with our post.

   script/plugin install git://github.com/thoughtbot/paperclip.git

Next, we need to add the Paperclip fields to the Post model:

   script/generate migration AddPaperclipColumnsToPost
   # in the newly-created migration   def self.up     add_column(:posts, :image_file_name, :string)     add_column(:posts, :image_content_type, :string)     add_column(:posts, :image_file_size, :integer)     add_column(:posts, :image_updated_at, :datetime)   end    def self.down     remove_column(:posts, :image_file_name)     remove_column(:posts, :image_content_type)     remove_column(:posts, :image_file_size)     remove_column(:posts, :image_updated_at)   end

We also need to make the Paperclip declaration in the Post model:

   class Post < ActiveRecord::Base     has_attached_file :image, :styles => {:large => "500x500", :medium => "250x250", :thumb => "100x100"}   end

And finally we make the updates to the views. First change the new and edit views, adding the file_field for the attachment and making sure the form is set to accept multipart data (see the source on Github if you have questions). Then update your show view to display the image:

   <%= image_tag @post.image.url(:large) %>

Now let’s take a look at our application in Firefox. Remember, we’re running it in production mode to see the benefits of the AssetPackager plugin among other things. Create a new post with the image attachment of your choice.

One gotcha – if you are running your application using Passenger, you may see an error something like this when you try to create a Paperclip attachment:

   Image /tmp/passenger.621/var/stream.818.0 is not recognized by the 'identify' command.

In order to avoid this, create a file in /config/initializers to tell Paperclip where to find ImageMagick. I installed ImageMagick using MacPorts, so my file looks like:

   Paperclip.options[:command_path] = "/opt/local/bin"

Okay, now that we have a new post with an image, browse to the post detail page, open up the YSlow interface, click “Run Test” and take a look at the second grade, “Use a Content Delivery Network (CDN)”.

Posts: show
Uploaded with plasq’s Skitch!

Ugh, we got a “D”. Okay, let’s see how we can implement Amazon CloudFront to make that grade an “A”.

Let’s start by telling Paperclip to use S3 for our image storage. Go ahead and create a configuration file called amazon_s3.yml. Obviously, you’ll need to replace the values here with your own keys:

   # config/amazon_s3.yml   development:     access_key_id: 123...     secret_access_key: 123...   test:     access_key_id: abc...     secret_access_key: abc...   production:     access_key_id: 456...     secret_access_key: 456...

Paperclip depends on the ‘right_aws’ gem for its S3 storage, so make sure you add that to your config.gem list in /config/environment.rb and install it with:

   rake gems:install

Next, update the Post model so it will use the new S3 configuration:

   class Post < ActiveRecord::Base     has_attached_file :image,                      :styles => {:large => "500x500", :medium => "250x250", :thumb => "100x100"},                      :storage => 's3',                      :s3_credentials => YAML.load_file("#{RAILS_ROOT}/config/amazon_s3.yml")[RAILS_ENV],                      :bucket => "built-for-speed",                      :path => ":class/:id/:style.:extension"   end

Now restart your application and create a new post with an image. When you get to the post detail page, check out the source and you should see that your image is being served from your S3 bucket. That’s great, but what we really want to do is serve the image from the CloudFront CDN. The easiest way to do this is to install the S3 Firefox Organizer plugin). Once you enter your credentials, you should see your newly-created ‘built-for-speed’ bucket. Right-click on the bucket name and click “Manage Distributions”, then optionally add a comment and click “Create Distribution” (we’ll skip the CNAME option for now).

S3 Firefox Organizer
Uploaded with plasq’s Skitch!

This will generate a new resource URL for you to use in your application so you can take advantage of CloudFront. Now we have to go back and tell our application to use this resource URL:

   # /config/initializers/cloudfront.rb   #    # Note that your CloudFront resource URL will be different   CLOUDFRONT_DISTRIBUTION = "http://d2qd39qqjqb9uw.cloudfront.net"
   # in /app/models/post.rb   def cloudfront_url( variant = nil )     image.url(variant).gsub( "http://s3.amazonaws.com/built-for-speed", CLOUDFRONT_DISTRIBUTION )   end
   # in /app/views/posts/show.html.erb   <%= image_tag @post.cloudfront_url(:large) %>

Restart the application and go back to the post detail page. Inspect the source and you’ll see that your image is now being served from CloudFront.

Okay, I think that’s enough for today. In the next post, I’ll show you how to avoid CloudFront serving stale assets and how to make YSlow recognize that you are now using a CDN. Please leave any questions or comments below.

CREDITS/RESOURCES:

  • Nick Zadrozny’s YSlow presentation from SD Ruby
Categories
Author

If you've used attachment_fu (introduction here) in your Rails applications, you probably love its simple nature and its S3 integration. You may love less its very sparse documentation. When working on a project recently, I needed to save items to a path based on the owner of the attachment model, not the model itself.

The first attempt involved adding inline instance method calls to the :path_prefix option passed into has_attachment. This failed because has_attachment works on the class level, not the instance level.

After digging deeper, I found that the only thing one needs to do in order to change the path of a save in attachment_fu is to have a defined base_path method in your model. In the example of a user-based system with an avatar stored for each user, this might be a useful way to define your base_path:

class Avatar  :image,                 :storage => :s3,                 :resize_to => '150x150'  				   	    def after_save      # Delete any existing avatars they have uploaded.      Avatar.find(:all, :conditions => ["user_id = ?",self.user_id]).each do |ava|        ava.destroy unless ava.id == self.id      end    end          # Here we define base_path and therefore save to a custom location    def base_path      File.join("users", self.user.login, "avatar")    end  	    validates_as_attachment  end

This is a very simple example, but this provides a model of an avatar that will save to a folder under users/theusername with the filename the same as . For even further customization (including the filename), dig into the full_filename method in your storage solution of choice, and override in a similar fashion.

Just a quick Rails tip to help you along your attaching way.

Categories
Author
1
Subscribe to S3